
Soups & Stews
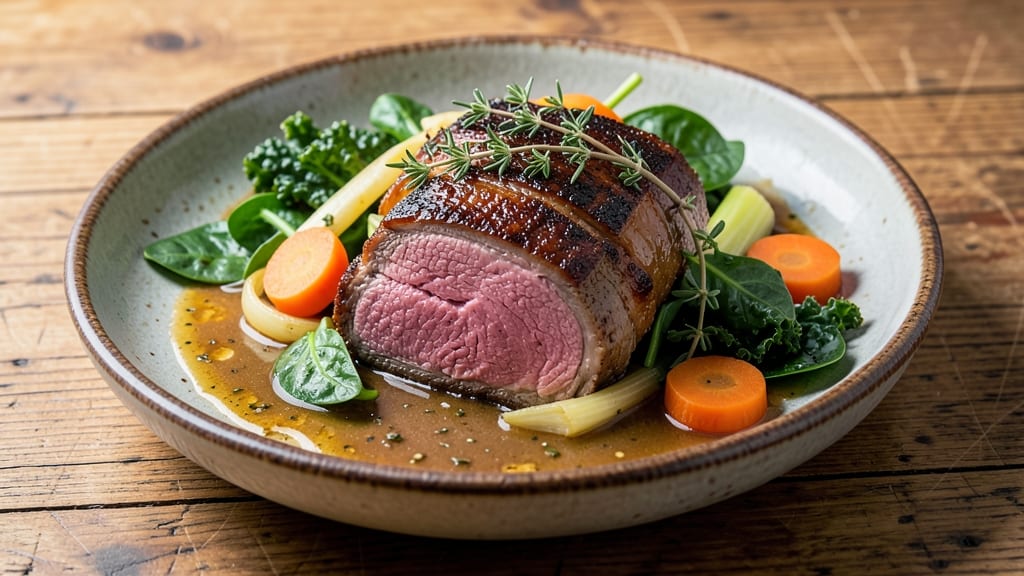
This beef and greens recipe transforms tough cuts into melt-in-your-mouth tenderness while turning simple greens into a flavorful side. The slow-braising process breaks down collagen, creating a rich, savory beef that pairs perfectly with wilted greens—whether you prefer collards, spinach, or kale.
What sets this dish apart is the balance of deep, caramelized flavors from the beef and the bright, earthy notes of the greens, all achieved with minimal effort.
The secret to tender beef lies in the slow cook—low and slow for hours until the meat is fork-tender and the greens wilt just enough to absorb the beef’s juices.
You’ll start with a simple sear to lock in flavors, then let the aromatics (garlic, onions, and herbs) build a fragrant base before adding the beef and liquid. The greens come in later, steaming gently in the residual heat to soften without losing their vibrant color.
By the time you serve this dish, you’ll have a plate that’s rich in texture and flavor—tender beef with a glossy sheen, paired with greens that are just wilted enough to cling to the meat.
The result is a hearty, comforting meal that feels restaurant-quality but is simple enough for a weeknight. The best part? Leftovers taste even better the next day as the flavors deepen.
This recipe works equally well as a standalone dish or alongside crusty bread to soak up every last bit of the braising liquid. Whether you’re serving a family dinner or meal prepping for the week, the combination of protein and greens ensures a balanced, satisfying meal.
Let’s get started—your taste buds will thank you.
Ingredients for beef and greens
Pantry staples meet slow-cooked magic for this restaurant-worthy beef and greens.
| Ingredient | Amount | Notes |
|---|---|---|
| Chuck Roast 🥩 | 2 lb | Tough cut for slow braising |
| Yellow Onion 🧅 | 1 whole | Chopped into 1/2-inch pieces |
| Garlic Cloves 🧄 | 4 cloves | Minced for aromatic base |
| Carrots 🥕 | 3 whole | Cut into 1-inch chunks |
| Celery Stalks 🥬 | 3 whole | Chopped into 1-inch pieces |
| Fresh Thyme 🌿 | 2 tbsp | Leaves only, chopped fine |
| Bay Leaves 🍃 | 2 whole | For deep herbal flavor |
| Beef Broth 💧 | 3 cups | Low-sodium preferred |
| Red Wine 🍷 | ½ cup | Bold dry variety (Cabernet) |
| Tomato Paste 🍅 | 2 tbsp | For rich depth of flavor |
| Olive Oil 🫒 | 2 tbsp | For searing beef |
| Salt 🧂 | 1 ½ tsp | Kosher or sea salt |
| Black Pepper 🌶️ | 1 tsp | Freshly ground preferred |
| Collard Greens 🌱 | 1 lb | Or sub spinach/kale |
| Smoked Paprika 🌶️ | ½ tsp | For subtle smokiness |
The chuck roast is the star—Costco or butcher shops usually carry it pre-cut, but if you're buying a whole roast, ask for the chuck section. Look for good marbling (those white fat streaks) as it'll melt during cooking and keep the meat juicy. Fresh thyme and bay leaves make all the difference here—Trader Joe's has great affordable bundles. For the greens, collards are my go-to, but spinach or kale work just as well. Just make sure they're fresh and vibrant, not wilted. The carrots and celery are the secret to building flavor—they caramelize beautifully and add natural sweetness to balance the richness of the beef.
No red wine? Beef broth with a splash of balsamic vinegar works perfectly. Pre-cut veggies from the salad bar are fine in a pinch, but whole carrots and celery give better flavor. The tomato paste can be substituted with 1/4 cup crushed tomatoes if you prefer. For the greens, if you're using spinach, add it later as it wilts faster. Kale? Tear it roughly for even cooking. The smoked paprika is optional but adds that subtle smokiness that takes this dish to the next level—Penzeys has great quality if you want to splurge. Don't skip the sear on the beef though—it locks in those flavors that'll develop during the long cook.
This dish tastes even better the next day as the flavors meld together. Store leftovers in an airtight container for up to 5 days in the fridge, or freeze for 3 months. I like to portion it out in meal prep containers so I can grab it straight from the fridge for lunches. The braising liquid is liquid gold—save some to make quick gravy or use it to deglaze pans. The greens will keep in a sealed bag in the fridge for 5 days, but use them within 2 days for best texture. If you make extra, freeze the greens separately—they'll wilt beautifully when reheated.
Why You'll Love This Recipe
- One-Pot Magic: I swear by this when I’m too tired to scrub three pots. Chuck roast, onions, and carrots all simmer together—no extra pans, no extra stress. The celery and garlic just melt into the sauce, and suddenly, dinner’s ready while I’m still wiping my hands.
- Deep, Rich Payoff: That chuck roast? It turns so tender it falls apart with a fork, but the edges stay just firm enough to hold. The onions caramelize right in the pot, and the greens (whatever you toss in—spinach, kale, even collards) wilt into something so flavorful, it’s like the whole dish hugs you.
- Leftovers That Please: Between us, this recipe makes way more than I need for one night. The next day, I reheat slices of that beef with a splash of the broth, and suddenly it’s a hearty sandwich or a quick stir-fry. Honestly, I make it on purpose just to have leftovers I’ll actually eat.
- Budget-Friendly Powerhouse: Chuck roast is cheap, and it stretches across multiple meals without breaking the bank. I buy it in bulk, freeze half, and still have enough for three dinners. Plus, the veggies—onions, carrots, celery—are pantry staples that don’t cost a fortune. Dinner for four for under $15? Yes, please.
Step-by-step instructions for slow-braised tender beef with wilted greens
Here's how to transform tough chuck roast into melt-in-your-mouth beef with rich, aromatic braising liquid.
Sear the Chuck Roast for Deep Flavor
Pat the 2 lb chuck roast completely dry with paper towels—this ensures a proper sear. Heat the 2 tablespoons olive oil in a large Dutch oven over medium-high heat until shimmering. Place the beef in the pot and sear on all sides until deeply browned, about 8-10 minutes total. You want that beautiful crust that locks in flavor and moisture.
Real talk: don't rush this step. The beef should develop a rich, caramelized crust that will dissolve into the braising liquid, creating layers of flavor. Once seared, remove the beef and set it aside on a plate.
Build the Aromatic Base
In the same Dutch oven, add the 1 whole yellow onion cut into ½-inch pieces, 3 whole carrots cut into 1-inch chunks, and 3 whole celery stalks chopped into 1-inch pieces. Cook for 5-6 minutes until the vegetables begin to soften and the onions turn translucent.
Add the 4 cloves garlic cloves (minced), 2 tablespoons fresh thyme (chopped), 2 whole bay leaves, and the 0.5 teaspoon smoked paprika. Stir everything together for 1 minute until fragrant—this is where the magic happens. The garlic should sizzle slightly but not burn.
Deglaze and Simmer the Braising Liquid
Pour in the 0.5 cup red wine and scrape up all those delicious browned bits from the bottom of the pot. Let it simmer for 2-3 minutes until the wine reduces by about half. Stir in the 2 tablespoons tomato paste and cook for another 1 minute to deepen the flavor.
Add the 3 cups beef broth, 1.5 teaspoons salt, and 1 teaspoon black pepper. Return the seared beef to the pot, along with any accumulated juices. Bring the liquid to a gentle simmer—it should just bubble lightly at the edges. Here's the thing: you want the beef mostly submerged in liquid, but that's okay if a little peeks out.
Slow Braise Until Fork-Tender
Cover the Dutch oven with a tight-fitting lid and transfer it to a 325°F oven. Braise for 2.5-3 hours until the beef is fork-tender. You'll know it's ready when a knife slides in easily and the meat pulls apart with gentle pressure. If the liquid reduces too much before the beef is tender, add a splash of water or broth.
I check for doneness by lifting the beef out of the liquid—it should feel soft and yield to gentle pressure. The liquid should have thickened into a rich, flavorful sauce. If it's not quite there, return it to the oven for another 30 minutes.
Wilt the Greens and Finish
While the beef rests, remove it from the pot and shred it using two forks. Return the shredded beef to the pot and stir in the 1 lb collard greens, cut into bite-sized pieces. Simmer uncovered for 5-7 minutes until the greens are wilted and tender.
Taste and adjust seasoning if needed—this is your chance to make it perfect. The greens should be bright and slightly crisp at the edges, not mushy. Serve immediately, letting each person spoon up the beef, greens, and rich braising liquid together for the ultimate comfort food experience.
Pro Tips For Making Beef And Greens
- Sear the Chuck First: That thick crust on your roast isn’t just for looks—it’s what keeps the meat juicy. After patting it bone-dry with paper towels, hit it with high heat in your Dutch oven for 3-4 minutes per side until it’s deep brown. I used to skip this, and my beef always ended up dry. Trust me, the extra 5 minutes now saves you from tough meat later.
- Mise en Place the Veggies: Dice that onion, mince that garlic, and chop those carrots and celery exactly the same size—about ½-inch chunks. Uneven pieces mean some burn while others stay raw. I learned this the hard way when my celery turned to mush while the carrots stayed crunchy. A sharp knife and a cutting board make this faster than you’d think.
- Don’t Crowd the Pot: After browning the beef, remove it and let the onions, carrots, and celery sizzle undisturbed for 5 minutes. If you dump everything in at once, you’ll steam the veggies instead of caramelizing them. This is where the real flavor happens—skip it, and your dish tastes bland.
- Deglaze with Liquid: After the veggies soften, pour in just enough broth (or beer, if you’re fancy) to scrape up the browned bits stuck to the pot. Those bits are flavor gold—ignore them, and you’re wasting the best part. A splash of red wine works too, but keep it to ¼ cup or the acid will overpower the beef.
Common mistakes when making this dish
Overcooking the Greens
One of the most common mistakes is letting the greens turn to mush. Collards, spinach, and kale all wilt quickly—especially when added to hot braising liquid. I’ve seen people simmer them for 10+ minutes, resulting in a sad, watery pile instead of tender yet vibrant greens.
The goal is 5-7 minutes of gentle simmering until they’re just wilted, not mushy. If you’re using spinach, add it in the last 2-3 minutes only, as it wilts fastest. 🌱
Skipping the Sear
Some cooks rush through the searing step, thinking it’s optional. Big mistake! That initial 8-10 minute sear on the chuck roast creates the Maillard reaction, which builds deep, caramelized flavors that dissolve into the braising liquid.
Without it, your dish will taste flat and one-dimensional. Trust me, the extra 10 minutes at the start makes all the difference in the final result. 🔥
Using the Wrong Cut
Chuck roast is designed for slow braising—it’s tough but full of connective tissue that breaks down into gelatin during long cooking. Swapping it for a leaner cut like sirloin or flank steak will leave you with dry, chewy meat.
If you’re set on using a different cut, opt for something with marbling, like short ribs or brisket, and adjust the cooking time accordingly. 🥩
Ignoring the Liquid Level
The beef needs to be mostly submerged in liquid to braise properly, but don’t drown it. If the liquid level drops too low before the beef is tender, the meat will dry out. I’ve seen people add 4+ cups of broth upfront, only to end up with a watery stew.
Start with 3 cups and add ¼ cup increments as needed. The goal is a 1:1 ratio of liquid to beef by volume.
Not Resting the Beef
After braising, it’s tempting to shred and serve immediately. But skipping the 10-15 minute rest means juices will spill out when you cut into it, leaving you with dry meat. Let the beef rest in the pot with the lid on—this also lets the flavors meld even more.
I promise, the wait is worth it for that first forkful of juicy, flavorful beef. ⏰
Overcrowding the Pot
If your Dutch oven is too small for the ingredients, you’ll end up with uneven cooking and steamed veggies instead of caramelized aromatics. The 1-inch chunks of onion, carrot, and celery should have room to brown slightly before the liquid is added.
If your pot feels too crowded, cook the veggies in batches or use a larger pot. This ensures the base builds proper flavor before the braising begins. 🌡️
Nutrition facts
Frequently asked questions
Can I use frozen greens instead of fresh?
Fresh greens like collards or spinach work best for this recipe, but you can use frozen in a pinch. Thaw them first, then squeeze out excess water to prevent a watery dish. Add them to the pot just before serving and simmer for 3-4 minutes—they'll wilt faster than fresh. For best results, use frozen greens that are specifically labeled "chopped" for even cooking.
What if I don't have red wine?
No problem! Substitute with ½ cup beef broth plus 1 tablespoon balsamic vinegar for similar depth. The vinegar adds acidity that mimics wine's complexity. If you're avoiding alcohol entirely, use ½ cup apple cider or extra beef broth with a pinch of soy sauce for umami. The dish will still be delicious—just slightly different in flavor profile.
How do I make this dish in a slow cooker?
Transfer the seared beef and all ingredients (except greens) to your slow cooker. Cook on LOW for 6-7 hours or HIGH for 3-4 hours until the beef is tender. Shred the beef, return it to the pot, and add greens during the last 15-20 minutes of cooking. The slow cooker's gentle heat will prevent the greens from overcooking.
Can I prepare this ahead of time?
This dish tastes even better the next day as flavors deepen. After braising, let it cool completely, then refrigerate in an airtight container. Reheat gently on the stovetop over low heat for 10-15 minutes, adding a splash of water or broth if needed. The greens may wilt further during reheating, but they'll still be delicious.
What are good sides to serve with this?
This hearty beef pairs perfectly with crusty bread to soak up the braising liquid, or mashed potatoes for extra comfort. For a lighter option, try a fresh green salad with a tangy vinaigrette. If you want to keep it simple, serve with steamed rice or buttery cornbread. The key is balancing textures—something soft to complement the tender beef.