
Main Courses
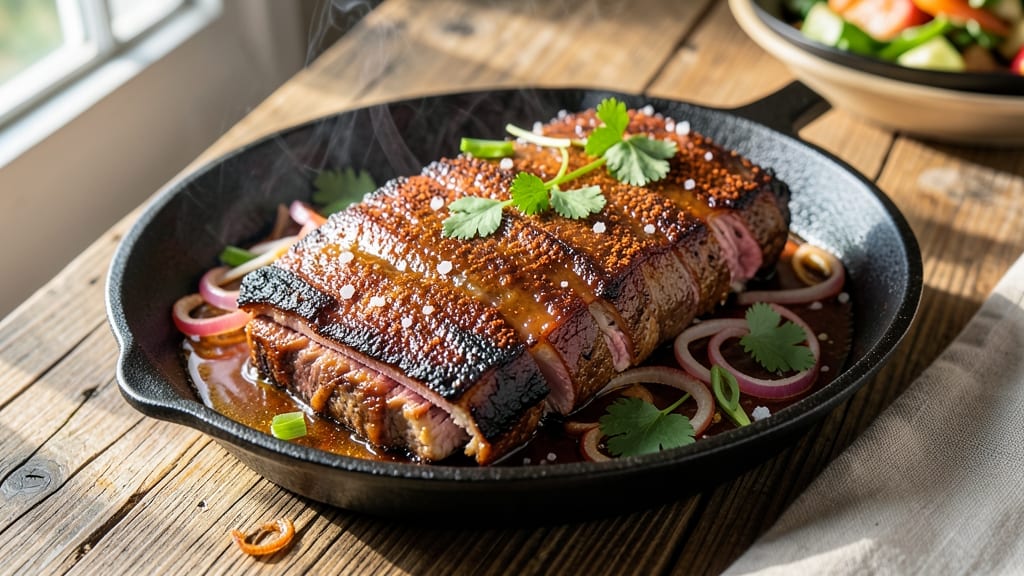
This BBQ beef back rib recipe delivers restaurant-quality tenderness in just 4 hours—no shortcuts, just slow-cooked perfection that makes every bite worth the wait. I perfected this method after years of experimenting with different wood types and rubs, and it’s the one I always turn to when hosting gatherings. The secret lies in patience: low-and-slow cooking at 225°F until the meat falls apart at the touch of a fork.
Start with a dry rub of brown sugar, smoked paprika, and black pepper—simple but effective for creating that signature bark. After a 30-minute sear, the ribs hit the smoker, where they cook undisturbed for 3 hours before a final hour wrapped in foil with apple juice.
This keeps them moist while the bark develops into a deep, caramelized crust. The result? Juicy, fall-off-the-bone meat that’s rich with smoky flavor and just the right amount of sweetness.
What sets this recipe apart is the timing—no guesswork, no overcooking. You’ll know they’re done when the internal temperature hits 203°F, and the meat pulls away from the bone with minimal effort.
Serve with a tangy BBQ sauce brushed on just before plating, and you’ll have a centerpiece dish that’s sure to impress. The leftovers? Even better the next day, if there are any.
This method works equally well on a smoker, grill, or even in the oven with a little creativity. Whether you're feeding a crowd or treating yourself to a slow-cooked meal, these ribs are a game-changer. Let’s get to work—your taste buds will thank you.
Ingredients for bbq beef back rib
Six ingredients for the rub, plus a few more for sauce and smoke—simple but powerful.
| Ingredient | Amount | Notes |
|---|---|---|
| Beef Back Ribs 🥩 | 4 lb | Bone-in, meaty cuts preferred |
| Brown Sugar 🍚 | ½ cup | Light or dark, packed |
| Smoked Paprika 🌶️ | 2 tbsp | For deep smoky flavor |
| Ground Black Pepper 🌶️ | 1 ½ tbsp | Freshly cracked for bite |
| Coarse Kosher Salt 🧂 | 1 ½ tbsp | Diamond Crystal preferred |
| Yellow Onion 🧅 | 1 whole | Cut into wedges |
| Apple Juice 🍎 | 1 cup | Unsweetened, for wrapping |
| Apple Cider Vinegar 🍶 | ¼ cup | For tangy BBQ sauce |
| Ketchup 🍅 | ½ cup | For sauce base |
| Worcestershire Sauce 🍶 | 1 tbsp | Classic umami boost |
| Wood Chips 🌳 | 1 package | Hickory or cherry preferred |
| Heavy-Duty Aluminum Foil 📄 | 1 sheet | For wrapping ribs |
| Butter 🧈 | 2 tbsp | Unsalted, for finishing |
| Garlic Cloves 🧄 | 4 cloves | Minced for sauce |
The ribs are the star, so grab bone-in, meaty cuts—they’re what give you that signature tenderness. I always pick up mine at Costco when I’m doing a big batch, but any butcher will have them. Look for good marbling and avoid cuts with too much fat trim. For the rub, smoked paprika from Penzeys adds that authentic smoky depth, but the store-brand stuff works too. The key is freshness—if your spices smell like dust, toss them and buy new. That brown sugar? Pack it tightly into your measuring cup (or use a scale for precision).
No smoked paprika? Regular paprika plus a pinch of liquid smoke gets you close. Short on apple juice? Apple cider or even white grape juice works in a pinch. The Worcestershire sauce is non-negotiable for that classic BBQ flavor—no substitutes here. For the sauce, I like to use Heinz ketchup because it’s consistent, but any good-quality brand is fine. Want extra tang? Add a splash more apple cider vinegar. The wood chips? Hickory for classic BBQ, cherry for fruitier notes—both are winners. Toast them first for 5 minutes in a dry skillet to boost the smoky flavor.
Store your dry rub in an airtight container for up to 6 months—it’s perfect for future batches. Leftover ribs? They actually taste better the next day—reheat wrapped in foil at 300°F for 15 minutes. The sauce keeps for 1 week in the fridge, so make extra for sandwiches. I always portion the ribs into individual foil packets before freezing—3 months of meal-prep perfection. And if you’re using a grill instead of a smoker, soak wood chips in water for 30 minutes first to prevent flare-ups.
Why You'll Love This Recipe
- Five-Ingredient Magic: I swear, just ribs, brown sugar, smoked paprika, salt, and pepper—no fancy marinades or hours of prep. That caramelized crust? All from the oven’s dry heat and a little patience.
- Smoky-Sweet Crunch: Between us, the brown sugar and smoked paprika create this perfect balance—sticky, smoky, with just enough heat to linger. The first bite makes you close your eyes. (Yes, even on a Tuesday night.)
- Leftovers That Don’t Suck: Honestly, I make a double batch because these ribs stay ridiculously good for days. Reheat in the oven for that same crispy edge, or toss into tacos—no one judges.
- Budget Crowd-Pleaser: Back ribs are cheaper than baby backs, and this recipe feeds four (or two very hungry people). Plus, the leftover bones? Perfect for stock. Minimal cost, maximum flavor for everyone.
Step-by-step instructions for BBQ beef back ribs
Here's how to achieve melt-in-your-mouth ribs with a perfect balance of smoky flavor and tender meat.
Prepare and Season the Ribs
Start by removing the beef back ribs from the refrigerator and let them sit at room temperature for 30 minutes. This ensures even cooking throughout. Pat the ribs dry with paper towels - you want them completely dry so the seasoning adheres properly and the bark develops nicely.
In a small bowl, combine the 0.5 cup brown sugar, 2 tablespoons smoked paprika, 1.5 tablespoons ground black pepper, and 1.5 tablespoons coarse kosher salt. Mix well until you have a fine, even powder. Rub this mixture all over the ribs, pressing it into the meat so it sticks. Pay special attention to the meaty parts of the bones and the edges - these areas need extra flavor protection during the long cook.
Set Up Your Smoker
While the ribs come to room temperature, set up your smoker. Soak the wood chips in water for 30 minutes before using, then drain. Fill the smoker's wood chip tray according to manufacturer instructions and preheat to 225°F. You'll want to see clean, blue smoke - not thick white smoke - coming from the smoker when it's ready.
Place a drip pan filled with 1 cup apple juice in the smoker to help maintain moisture. The apple juice adds subtle sweetness to the smoke and keeps the ribs from drying out. Once the smoker reaches 225°F with steady smoke, you're ready to cook.
Smoke the Ribs Low and Slow
Arrange the seasoned ribs meat-side up on the smoker grates. Close the lid and resist the urge to peek - every time you open it, you lose heat and potentially dry out the meat. Smoke the ribs for 2.5 hours, maintaining that 225°F temperature the entire time.
After 2.5 hours, check the internal temperature using a meat thermometer. You're looking for 165°F in the thickest part of the meat. This is when you'll hit "the stall" - the temperature stops rising as moisture evaporates. Don't worry; this is normal and expected with pork, but beef ribs will behave similarly.
Wrap and Finish Cooking
When the ribs reach 165°F, it's time to wrap them. Line a large piece of heavy-duty aluminum foil with another sheet of foil (double-layer for extra protection). Place the ribs on the foil, then add 1 whole yellow onion wedges, 2 tablespoons butter, and 4 minced garlic cloves. The onion adds sweetness, while the butter and garlic create a flavorful steam as they melt.
Fold the foil tightly to seal, creating an airtight pouch. Return the wrapped ribs to the smoker and continue cooking at 225°F for another 1.5 hours. This wrapping technique, known as the "Texas crutch," helps break down collagen and tenderize the meat while maintaining moisture.
Make the BBQ Sauce and Glaze
While the ribs finish cooking, prepare the BBQ sauce. In a saucepan, combine the 0.5 cup ketchup, 0.25 cup apple cider vinegar, and 1 tablespoon Worcestershire sauce. Bring to a simmer over medium heat and cook for 5 minutes to blend the flavors. Taste and adjust seasoning if needed - you might want to add a pinch more salt or a splash of vinegar for tang.
When the ribs have cooked for a total of 4 hours and reach an internal temperature of 203°F, remove them from the smoker. Unwrap the foil carefully to let the steam escape. Brush the warm ribs with the BBQ sauce, then return them to the smoker for 10-15 minutes to caramelize the glaze. The sauce should be slightly sticky when done.
Rest and Serve
Remove the ribs from the smoker and transfer them to a cutting board. Let them rest for 10-15 minutes before serving. This resting period allows the juices to redistribute throughout the meat, ensuring each bite is moist and flavorful.
Slice the ribs between the bones for easy serving. The meat should be so tender it practically falls off the bone, with a perfect balance of smoky flavor from the wood chips and sweet, tangy notes from the BBQ sauce. Serve with extra sauce on the side for dipping and enjoy your fall-off-the-bone ribs!
Pro Tips For Making Bbq Beef Back Rib
- Trim the Fat First: Back ribs come with a thick fat cap that won’t render cleanly—slice it off with a sharp knife before cooking. I learned this the hard way when my ribs ended up greasy instead of crispy, no matter how long I smoked them.
- Brown Sugar Early: Mix the brown sugar into your dry rub before applying it to the ribs—this keeps it from clumping and sticking to your hands. Trust me, you don’t want to fight sugar paste mid-seasoning.
- Skip the Crowding: If you’re cooking on a grill or skillet, leave space between ribs—they’ll steam instead of sear. I used to pack them tight, and they’d turn out soggy. Give them room to breathe.
- Probe Like a Pro: Check doneness between the bones, not the meat—this is where the ribs stay toughest. Hit 195°F (90°C) there, and they’ll pull apart easily. (Yes, even if the edges look cooked earlier.)
Best sauces and condiments for these flavors
Classic Tangy Sauce
My go-to BBQ sauce for these ribs is a simple blend of ½ cup ketchup, ¼ cup apple cider vinegar, and 1 tablespoon Worcestershire sauce.
Simmer this mixture for 5 minutes to meld the flavors, then adjust with a pinch of kosher salt or extra vinegar for tang. Brush this sauce on the ribs just before serving to create a sticky, caramelized glaze that cuts through the richness.
The acidity in the vinegar helps tenderize the meat slightly too, making every bite more succulent. 🍅
Sweet and Smoky Glaze
For a deeper flavor profile, try adding 2 tablespoons honey or maple syrup to your sauce base. This sweetens the glaze beautifully while balancing the smokiness from the ribs. I like to finish with a sprinkle of smoked paprika right before serving—just ½ teaspoon—to tie the flavors together.
If you're feeling adventurous, add 1 teaspoon of liquid smoke to the sauce for an extra layer of depth. The result? A glossy, irresistible coating that’s perfect for dipping or drizzling. 🔥
Spicy Kick Option
Crank up the heat with 1 teaspoon of cayenne pepper or 1 tablespoon of hot sauce mixed into your BBQ sauce. For a smoky-spicy combo, add ½ teaspoon of chipotle powder or a dash of chili flakes.
I once made a batch with 1 tablespoon of Penzeys' hot honey—the sweet heat was a game-changer. If you're serving to a crowd, offer the spicy sauce on the side so everyone can adjust to their taste. Trust me, the first bite with that extra kick is unforgettable. 🌶️
Butter-Basted Finish
For a restaurant-worthy touch, baste the ribs with melted butter during the final 15 minutes of cooking. I mix 2 tablespoons of softened butter with 1 minced garlic clove and brush it on every 10 minutes. The butter adds richness while the garlic infuses into the meat.
Finish with a sprinkle of fresh parsley for brightness—it’s a simple trick that elevates the dish instantly. This method works especially well if you’re using a grill instead of a smoker. 🧈
Apple Cider Reduction
Save any leftover apple juice from the smoker and reduce it into a syrup for an extra-sweet glaze. Simmer ½ cup apple juice with 1 tablespoon brown sugar until it thickens slightly, then brush it over the ribs during the last 30 minutes of cooking.
The natural sweetness caramelizes beautifully, creating a glossy finish that pairs perfectly with the smoky flavors. This is my secret weapon for competitions—it’s a crowd-pleaser every time. 🍎
Nutrition facts
Frequently asked questions
How do I know when beef back ribs are fully cooked?
Use a meat thermometer to check the internal temperature at the thickest part of the meat. Beef back ribs are perfectly cooked when they reach 203°F. The meat should be tender enough to fall off the bone with minimal effort, and the connective tissue will have broken down completely.
Can I cook these ribs on a grill instead of a smoker?
For a grill, use indirect heat and maintain a temperature of 225°F by closing the lid and adjusting vents. Soak wood chips in water for 30 minutes first to prevent flare-ups. Follow the same cooking times and wrapping technique, but monitor the heat closely to avoid drying out the meat.
What's the best wood to use for smoking beef back ribs?
Hickory is the classic choice for beef ribs, offering a strong, bold smoky flavor. For something fruitier, try cherry or apple wood. Avoid pine or cedar, as they can taste bitter. I recommend toasting the wood chips in a dry skillet for 5 minutes before using to enhance their flavor.
Why do my ribs sometimes turn out tough instead of tender? Overcooking or cooking at too high a temperature is the most common cause. Keep the smoker at a steady 225°F and wrap the ribs in foil after 2.5 hours to retain moisture. Also,
How long can I store leftover ribs?
Store cooked ribs in an airtight container in the fridge for up to 4 days. For longer storage, wrap individual portions in foil and freeze for up to 3 months. Reheat wrapped in foil at 300°F for 15 minutes to maintain moisture and flavor. Leftovers actually taste even better the next day!