
Soups & Stews
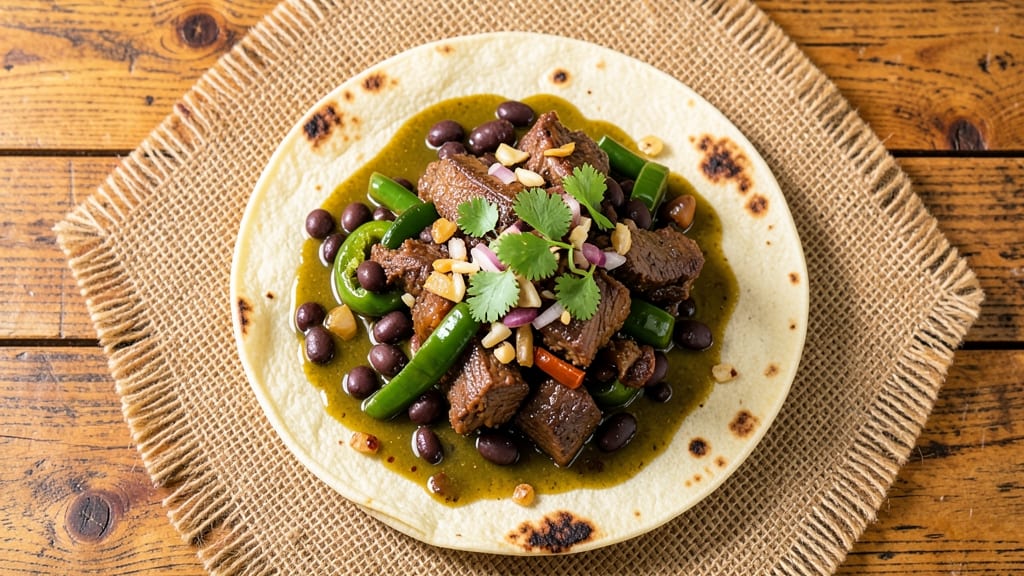
This beef bean green chili burrito recipe delivers the perfect balance of smoky, spicy, and hearty flavors wrapped in crispy tortillas—exactly what makes it a weeknight staple. The secret lies in slow-cooked beef that stays tender, homemade green chili sauce with deep, earthy notes, and beans that absorb all the rich flavors. I’ve perfected this version over years of testing, ensuring every bite is packed with texture and warmth without being overly heavy.
The beauty of this recipe is its flexibility—whether you prefer classic slow-cooked beef or a quicker skillet method, the flavors adapt seamlessly. The green chili sauce, made from scratch with fresh or canned chilis, adds a vibrant kick that pairs perfectly with the savory beef and beans.
What makes it stand out is the crispy tortilla technique: lightly charring the tortillas in a dry skillet before filling ensures they hold up to the hearty filling without getting soggy.
By the time you’re done, you’ll have burritos that are crispy on the outside, tender on the inside, and bursting with smoky, spicy, and creamy flavors in every bite.
The combination of slow-cooked beef, flavorful beans, and zesty green chili sauce creates a filling that’s satisfying yet balanced—perfect for a cozy dinner or a meal-prep favorite. Serve with rice, guacamole, or sour cream for the full experience.
This recipe is designed to be foolproof, with clear steps for cooking the beef, preparing the sauce, and assembling the burritos. Whether you’re feeding a crowd or meal prepping for the week, the results are always restaurant-quality. Let’s get started!
Ingredients for beef bean green chili burrito
Twelve ingredients for burritos that taste like a restaurant favorite—crispy outside, packed with smoky-sweet filling inside.
| Ingredient | Amount | Notes |
|---|---|---|
| Chuck Roast 🥩 | 2 lb | Cut into 1-inch cubes |
| Large Flour Tortillas 🌯 | 12 whole | Flour or corn, 10-inch size |
| Green Chili Peppers 🌶️ | 4 whole | Fresh or canned, roasted |
| Onion 🧅 | 1 whole | Yellow or red, diced |
| Garlic Cloves 🧄 | 6 cloves | Minced or pressed |
| Canned Black Beans 🫘 | 2 cups | Drained and rinsed |
| Tomato Paste 🍅 | ½ cup | No salt added |
| Beef Broth 💧 | 2 cups | Low-sodium preferred |
| Chili Powder 🌶️ | 2 tbsp | Smoked or mild |
| Ground Cumin 🌿 | 1 tbsp | Toasted for depth |
| Olive Oil 🫒 | 2 tbsp | Extra-virgin preferred |
| Salt 🧂 | 1 ½ tsp | Kosher or sea salt |
| Black Pepper 🌶️ | ½ tsp | Freshly ground |
| Cheddar Cheese 🧀 | 2 cups | Shredded, sharp variety |
| Sour Cream 🥛 | ½ cup | For serving |
The chuck roast is your secret weapon here—it stays tender even after slow cooking, soaking up all those smoky flavors. Costco or Walmart usually have it pre-cut, but if you're buying a whole roast, look for good marbling. The green chilis? Fresh roasted from the store add the best depth, but canned works in a pinch. I grab mine from the Latin market section—they’re often cheaper and fresher than the regular produce aisle. For the tortillas, Mission or La Tortilla Factory are my go-tos, but any sturdy flour tortilla will work. Skip the corn if you want that classic burrito texture.
No fresh chilis? Roasted canned green chilis are a perfect swap—they’ve already got that smoky flavor. The chuck roast can be swapped for beef stew meat if you’re in a hurry, though it won’t be quite as tender. Short on cumin? Mexican oregano at half the amount gives a similar earthy kick. The tomato paste is non-negotiable for that rich, concentrated flavor, but if you’re avoiding it, blend 1 cup of cooked tomatoes instead. For the cheese, Monterey Jack melts better if you’re worried about clumping, though sharp cheddar is classic for a reason.
The filling keeps well for 3 days in the fridge, so make extra—it’s perfect for meal prep. Store the tortillas in a cool, dry place (they’ll crisp up better when fresh), and keep the cheese in the fridge until ready to assemble. These burritos reheat beautifully—30 seconds in the microwave with a damp paper towel keeps them crispy. For maximum crispiness, char the tortillas in a dry skillet for 20 seconds per side before filling, just like the pros do.
Why You'll Love This Recipe
- Slow-Cooker Magic: I swear by this recipe—toss the chuck roast, onions, and green chilis into a slow cooker with a splash of broth, and let it melt into tender, flavorful shreds. By dinnertime, the beef falls apart at the touch of a fork, and the green chilis have softened just enough to add smoky heat without overpowering.
- Tortilla Hugs: The moment I wrap that spiced beef, beans, and melted cheese in a warm flour tortilla? Pure satisfaction. No fancy folding skills needed—just roll, tuck, and eat. (Yes, even if it looks like a burrito that’s been through a blender.)
- Lunchbox Hero: Between us, these burritos are my go-to for packed lunches. I make a double batch on Sundays, wrap them in foil, and they stay fresh for days—no sad, soggy leftovers here. The green chili peppers keep the flavors bright, so they taste like you just made them.
- Budget Powerhouse: Chuck roast is my secret weapon for stretching meals without breaking the bank. A pound feeds four, and the green chilis add that restaurant-worthy kick for pennies. Honestly, it’s the kind of recipe that makes me feel like I’m feeding the whole family without stressing over the grocery bill.
Step-by-step instructions for beef bean green chili burritos
Here's how to build smoky, spice-packed burritos with perfectly crispy tortillas and tender beef.
🍳 Step 1: Brown the Chuck Roast for Deep Flavor
Heat 1 tablespoon olive oil in a large Dutch oven over medium-high heat. Add the 2 lb chuck roast cut into 1-inch cubes and brown on all sides, working in batches if needed. This step develops rich, caramelized flavors that'll carry through your filling. You want deep golden brown color—about 5-7 minutes total.
Once browned, transfer the beef to a plate and set aside. If your pan looks dry, add another 1 tablespoon olive oil—you'll need that fat for the next steps. Don't drain the browned bits; they're packed with flavor that'll form the base of your sauce.
🍳 Step 2: Build the Smoky Chili Base
In the same Dutch oven, add 1 whole diced onion and cook for 5 minutes until softened. Stir in the 6 minced garlic cloves and cook for 30 seconds until fragrant. Add the 4 whole green chili peppers (chopped if fresh) and cook for another 2 minutes to soften.
Pour in the 2 tbsp chili powder, 1 tbsp ground cumin, 1.5 tsp salt, and 0.5 tsp black pepper. Stir to toast the spices for 30 seconds**—this wakes up their flavors. Then add the 0.5 cup tomato paste and the reserved beef, breaking it up with a wooden spoon.
🥘 Step 3: Simmer the Filling Until Tender
Pour in the 2 cups beef broth and stir to combine. Bring to a simmer, then reduce heat to low and cover. Let it cook for 1.5 hours, stirring occasionally, until the beef is fork-tender. You'll know it's ready when the meat pulls apart easily and the sauce has thickened slightly.
Stir in the 2 cups drained black beans and cook uncovered for another 10 minutes to heat through. The beans should be warm but not mushy. Taste and adjust seasoning—you might want to add a pinch more salt or a dash of chili powder to your liking.
🔥 Step 4: Warm and Prepare the Tortillas
While the filling simmers, warm the 12 large flour tortillas for 30 seconds each in a dry skillet over medium heat. You want them pliable but not crispy—just warm enough to handle easily. Keep them wrapped in a clean kitchen towel to stay soft.
Here's the trick for crispy burritos: After filling each tortilla, roll it tightly and press the edges firmly. Then, place it seam-side down in the same skillet for 30 seconds per side until golden brown spots appear. This creates that perfect crunchy exterior while keeping the inside warm and gooey.
🥘 Step 5: Assemble and Serve with Cheese and Sour Cream
Spoon about ½ cup of the beef mixture onto each warmed tortilla. Top with ⅓ cup shredded cheddar cheese—this will melt beautifully during serving. Roll tightly from the bottom, tucking in the sides as you go. For extra crispiness, you can optionally pan-sear the completed burritos for 1 minute per side.
Serve immediately with the remaining 0.5 cup sour cream for dipping or dolloped on top. Each bite should deliver tender beef, smoky spices, and that perfect contrast of crispy tortilla with creamy filling. The cheese should be melted but not soupy, and the tortilla edges should have just the right amount of crunch.
Pro Tips For Making Beef Bean Green Chili Burrito
- Sear Chuck Roast First: I learned this the hard way—skipping the sear means flavorless beef. Pat the chuck roast dry, then hit it with high heat in a Dutch oven for 3-4 minutes per side until deep brown. That crust locks in moisture and builds depth when you later slow-cook it with beans and green chilis.
- Char Green Chilis Directly: Sounds weird, but it works: toss whole green chilis (seeds and all) into a dry skillet over medium-high heat for 1-2 minutes until blackened in spots. The smoky bitterness cuts through the richness of the beef and tortillas—way better than just dicing them raw.
- Salt Tortillas Before Warming: I used to skip this, but the difference is noticeable. Lightly brush flour tortillas with oil, sprinkle with a pinch of salt, then warm them—either in a dry skillet for 10 seconds per side or wrapped in a damp towel in the microwave for 20 seconds. The salt keeps them from getting soggy when stuffed.
- Save Time with Pre-Cooked Beans: Does it look weird? Yes. Does it work? Every single time. Swap canned refried beans for a quick batch of black beans sautéed with cumin and garlic—just heat them with a splash of broth in a pot for 5 minutes. No soaking, no waiting; same texture, same flavor, half the effort.
Storing and reheating this beef bean green chili burrito
Fridge Storage Tips
Store your assembled burritos in an airtight container with parchment paper between layers to prevent sticking. They’ll keep fresh in the fridge for 3-4 days, though I find the filling tastes even better the second day as flavors meld.
Keep the tortillas separate in a ziplock bag to maintain crispness—just warm them in a dry skillet for 20 seconds per side before assembling fresh burritos. 🌯
Freezer-Friendly Method
For long-term storage, freeze the filling and tortillas separately. Portion the beef mixture into quart-sized freezer bags, leaving 1 inch headspace for expansion. Label with the date—these last 3 months without losing flavor.
When ready to eat, thaw overnight in the fridge, then warm the filling in a pot with 2 tablespoons water to prevent drying. Warm tortillas separately in a skillet. ❄️
Reheating for Crispy Results
Microwave reheating works, but for crispy tortillas, I recommend oven or skillet methods. For the oven method, bake at 375°F for 10 minutes until heated through. For skillet crisping, heat a dry pan over medium heat and warm each burrito for 1-2 minutes per side until golden.
Add a splash of water to the pan to create steam—this keeps the filling moist while crisping the tortilla. 🔥
Meal Prep Hacks
Prep the filling ahead and store it in the fridge for up to 5 days. Keep tortillas in a cool, dry place (not the fridge) to prevent sogginess.
When ready to assemble, warm the filling in a pot with ¼ cup broth, then fill tortillas and crisp in a skillet. I double the recipe and freeze half—perfect for lazy weeknights. Use parchment paper between layers to avoid sticking. 💡
Reviving Day-Old Burritos
If your burritos lose crispness overnight, no worries! Pop them in a 350°F oven for 5-7 minutes with a damp paper towel on top to restore moisture. For extra crunch, press them in a skillet for 30 seconds per side after reheating.
The filling stays flavorful even after reheating—just add a dollop of sour cream to cut through any dryness. 🌟
Nutrition facts
Frequently asked questions
Why does the recipe call for chuck roast instead of ground beef?
Chuck roast creates a more tender, flavorful filling that stays juicy even after slow cooking. The slow simmering breaks down the connective tissue, resulting in beef that's fork-tender and packed with rich, smoky flavors. Ground beef would work in a pinch, but it tends to dry out and lacks that deep, meaty satisfaction. For a quicker version, you could use beef stew meat instead.
Can I make these burritos ahead of time without losing crispiness?
Store the filling separately in an airtight container for up to 5 days. Keep tortillas in a ziplock bag to maintain crispness. When ready to eat, warm the filling in a pot with ¼ cup broth, then assemble fresh burritos and crisp them in a dry skillet for 30 seconds per side. For extra insurance, wrap each burrito tightly in foil before storing, then unwrap and crisp when ready to serve.
What's the best way to adjust the heat level for picky eaters?
Start by reducing the chili powder to 1 tablespoon instead of 2, and omit half the black pepper. For extra mildness, add ½ cup sour cream to the filling while cooking. You can also serve the burritos with cooling toppings like avocado, cilantro, or lime wedges. If you want to keep the spice but make it more approachable, try adding 1 teaspoon of honey or sugar to balance the heat.
How do I prevent my burritos from falling apart when rolling?
Keep your filling warm but not piping hot when assembling to prevent melting the cheese too quickly. Use about ½ cup filling per tortilla and roll tightly from the bottom, tucking in the sides as you go. The secret is pressing firmly as you roll—this creates a tight seal. If your tortillas are too soft, warm them in a dry skillet for 20 seconds per side before filling. For extra stability, lightly brush the edges with water before rolling.
Can I substitute canned green chilis for fresh?
Yes! Canned green chilis work perfectly and save time. Use 1 (15 oz) can of roasted green chilis, drained and chopped, as a direct substitute for 4 fresh chilis. The canned version has that ideal smoky flavor already developed. For extra depth, add ½ teaspoon of smoked paprika to the filling. If you prefer a milder taste, use mild green chilis instead of hot, and reduce the overall chili powder by ½ teaspoon.