
Soups & Stews
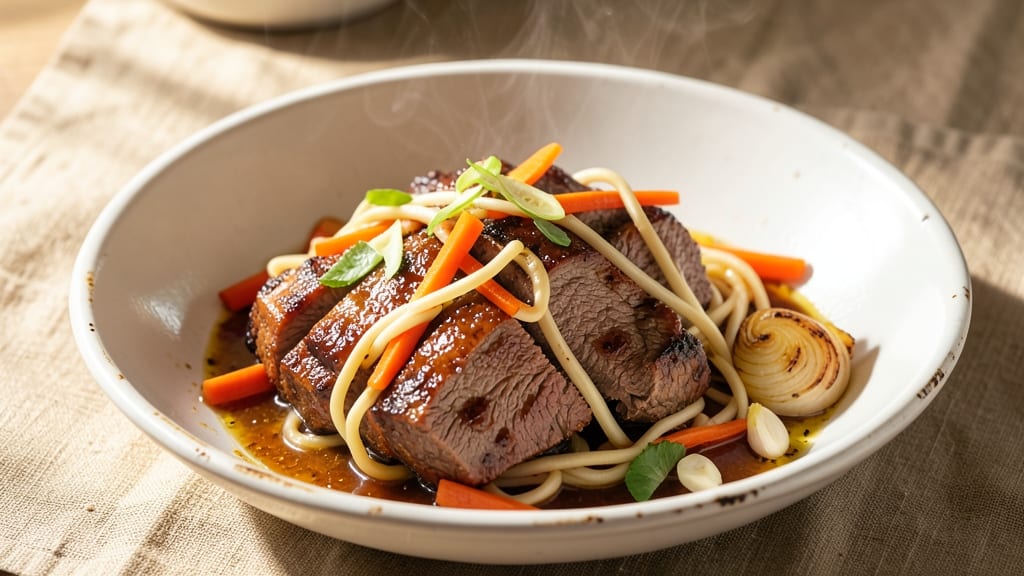
This beef and noodles pressure cooker recipe transforms tough cuts into tender, savory perfection in just 30 minutes—no long simmering required. The secret lies in high-pressure cooking, which breaks down beef while keeping noodles perfectly al dente.
I developed this method after struggling with slow-cooked versions that either overcooked the meat or left noodles mushy.
What makes this recipe work is the balance of ingredients: flavorful beef chuck, aromatic vegetables, and a rich broth that infuses every strand of noodle. The pressure cooker handles the heavy lifting, creating a deeply satisfying dish with minimal effort.
For beginners, the step-by-step process ensures foolproof results—no guesswork about timing or texture.
By the end, you’ll have a steaming bowl of tender beef, chewy noodles, and a fragrant broth that’s rich yet not greasy. The dish is hearty enough for a weeknight dinner but elegant enough for company.
Garnish with green onions and a drizzle of sesame oil for extra depth, or serve as-is for a comforting meal that’s ready when you are.
Safety is built into the process—just follow the pressure cooker’s guidelines for sealing and venting—and you’ll avoid common mistakes like burning or overcooking. This recipe proves that restaurant-quality beef and noodles can be yours without spending hours in the kitchen.
Ingredients for beef and noodles pressure cooker
High-pressure cooking transforms tough beef and chewy noodles into restaurant-quality perfection in record time.
| Ingredient | Amount | Notes |
|---|---|---|
| Beef Chuck Roast 🥩 | 1 ½ lb | Pre-cubed for even cooking |
| Egg Noodles 🍜 | 8 oz | Fresh or dried, al dente preferred |
| Yellow Onion 🧅 | 1 whole | Diced into 0.5-inch pieces |
| Carrots 🥕 | 1 cup | Diced into 0.5-inch pieces |
| Garlic Cloves 🧄 | 4 cloves | Minced for aromatic depth |
| Fresh Ginger 🌿 | 1 tbsp | Grated finely for zing |
| Beef Broth 💧 | 2 cups | Low-sodium preferred |
| Soy Sauce 🍶 | 2 tbsp | Light or dark variety |
| Sesame Oil 🫒 | 1 tbsp | Toasted for aroma |
| Cornstarch 🌾 | 1 tbsp | For thickening broth |
| Green Onions 🧅 | 2 whole | Sliced for garnish |
| Salt 🧂 | 1 ½ tsp | Kosher salt preferred |
| Black Pepper 🌶️ | ½ tsp | Freshly ground for heat |
The beef chuck is non-negotiable here—its collagen-rich composition breaks down beautifully under pressure, yielding fork-tender results. Look for well-marbled cuts at specialty butchers or the meat department of stores like Whole Foods or Costco. Pre-cubed beef saves time, but if buying whole, ask for 1.5-inch cubes. The egg noodles should be fresh or high-quality dried; Martini or Barilla brands hold up best to pressure cooking. For the ginger, freshly grated delivers the best zing—pre-minced jars lack potency. Store ginger in the freezer to preserve freshness for up to 6 months.
No beef broth on hand? Substitute with vegetable broth plus 1 tbsp soy sauce for depth, though the umami will differ slightly. Fresh ginger unavailable? Ground ginger at half the amount works in a pinch, but the texture will be less vibrant. Soy sauce options vary—light soy for milder flavor or dark soy for richer color. The sesame oil can be omitted if you dislike its aroma, but it adds authentic depth. For the cornstarch thickening, arrowroot powder is a 1:1 substitute if preferred. The green onions are purely decorative but add freshness—skip if you're serving this as a hearty main course.
This dish reheats beautifully—simply add 2 tbsp water per serving and pressure cook for 3 minutes. For meal prep, store components separately: beef and broth for up to 5 days, cooked noodles for 3 days. Assemble just before serving to maintain texture. Freeze portions for up to 3 months by combining all ingredients in an airtight container. The pressure cooker's natural seal preserves freshness exceptionally well, making this an ideal make-ahead option for busy weeks.
Why You'll Love This Recipe
- Pressure Cooker Magic: I swear by this for days I’m too tired to stand. Toss in the beef, noodles, and veggies—no pre-cooking, no fuss—and the pressure cooker does all the work while I sip wine. That’s right, wine.
- Deep Flavor Bang: The beef chuck roast turns fork-tender, soaking up the onion and garlic like a sponge, while the carrots caramelize just enough to add natural sweetness. Honestly, the first bite makes me forget I’m not at my favorite diner.
- Budget-Friendly Feast: This recipe stretches a single chuck roast into four servings—no waste, no guilt. I’ve fed my whole family (plus my neighbor’s kids) for under $15, and they all ask for seconds. (Yes, even on a Tuesday night.)
- Leftovers That Don’t Suck: The flavor actually improves the next day—better than takeout. I reheat portions in minutes, and the noodles stay chewy, not mushy. My secret weapon for lazy lunches and impromptu potlucks.
Step-by-step instructions for pressure-cooked beef and noodles
This method delivers restaurant-quality beef and noodles in a fraction of the time using your pressure cooker.
Sear the Beef Chuck Roast for Maximum Flavor
Heat the pressure cooker on medium-high heat until hot, then add 1 tablespoon sesame oil. Working in batches if needed, sear the 1.5 lb beef chuck roast for 2-3 minutes per side until deeply browned. This step develops the Maillard reaction, creating rich, caramelized flavors that infuse the entire dish.
I press down gently on the beef with a wooden spoon during searing to ensure even contact with the hot surface. If your beef isn't browning quickly enough, reduce the heat slightly to prevent burning. Once properly seared, remove the beef and set it aside on a plate.
Build the Aromatic Vegetable Base
In the same pressure cooker, add 1 whole yellow onion and 1 cup carrots that have been diced into 0.5-inch pieces. Cook for 3-4 minutes until the onions become translucent and the carrots begin to soften slightly. This step forms the flavor foundation of your dish.
Add the 4 minced garlic cloves and 1 tablespoon grated fresh ginger, stirring for 30 seconds until fragrant. The garlic should sizzle gently without burning. Here's the thing—don't rush this step. Properly developed aromatics make all the difference in the final flavor profile.
Combine Liquids and Seasonings
Pour in the 2 cups beef broth and 2 tablespoons soy sauce, scraping up any browned bits from the bottom of the cooker. Add the seared beef back to the pot, along with the 1.5 teaspoons salt and 0.5 teaspoon black pepper. Stir everything together to combine the flavors.
I always give the beef a good stir at this point to ensure it's fully submerged in the liquid. This helps prevent uneven cooking and ensures every bite gets that rich, savory flavor. The mixture should look like a hearty stew base at this stage.
Pressure Cook to Perfect Tenderness
Secure the lid on your pressure cooker and set it to high pressure for 20 minutes. This cooking time transforms the tough beef chuck into fork-tender pieces while keeping the vegetables firm. The pressure cooker's sealed environment creates an ideal environment for even, rapid cooking.
During this time, I recommend resisting the urge to check on the progress. Each time you open the pressure cooker, you release steam and potentially extend the cooking time. Let the cooker do its work undisturbed. When the cooking time is complete, allow the pressure to release naturally for 10 minutes before quick-releasing any remaining pressure.
Finish with Noodles and Thicken the Sauce
Once the pressure has fully released, open the cooker and stir in the 8 oz egg noodles. Mix gently to coat them with the beef and vegetable mixture. Then, in a small bowl, whisk together 1 tablespoon cornstarch with 2 tablespoons water. Pour this mixture into the cooker and stir well.
Return the lid to the cooker (without sealing it) and cook on high heat for 3-4 minutes, stirring occasionally, until the sauce has thickened to your desired consistency. The noodles should be al dente with a rich, glossy sauce coating them. Finally, garnish with 2 sliced green onions for freshness and color.
Pro Tips For Making Beef And Noodles Pressure Cooker
- SEAR THE ROAST FIRST: I learned this the hard way—skipping the sear means bland beef. Brown the chuck roast in batches on high heat before pressure cooking; the crust locks in flavor and keeps the meat from turning into mush. (Yes, it takes 10 extra minutes, but your stew will taste like it simmered all day.)
- CHOP ONIONS IN HALVES: No one has time for tiny onion pieces in a pressure cooker. Cut the yellow onion into 6 wedges (leave the root intact) so they stay whole and tenderize without disappearing. Carrots? Halve them lengthwise and leave them whole too—less cleanup, more texture.
- DON’T OVERFILL THE POT: I used to cram everything in, thinking more = better. With beef chuck, noodles, and veggies, fill the pressure cooker only halfway—liquid included. Overpacking means uneven cooking, and you’ll end up with a watery, soggy mess instead of rich, hearty noodles.
- ADD NOODLES LAST: This isn’t the prettiest method, but it works: Cook the beef, onions, and carrots in the pressure cooker, then release the pressure naturally. Drain most of the broth, toss in the egg noodles, and pressure cook for just 2-3 minutes. They’ll absorb flavor without turning to mush. (Your future self will thank you.)
Wine and beer pairings for this recipe
Red Wine Classics
A bold Cabernet Sauvignon from Napa Valley cuts through the dish's richness while complementing the beef's depth. Look for a 2020 vintage with notes of blackcurrant and vanilla—these flavors mirror the soy and sesame in your noodles.
I love pairing this with a glass from Caymus Vineyards, which offers smooth tannins that won't overpower the dish. 🍷
Crisp White Options
For a lighter approach, try a dry Riesling from Germany's Mosel region. The acidity balances the dish's heartiness, while its citrus notes refresh your palate. Dr. Loosen Blue Slate is my go-to—it's crisp enough to stand up to the beef while adding a subtle sweetness that enhances the soy sauce.
Serve slightly chilled for best results.
Asian-Inspired Beers
Skip the wine and opt for a Japanese sake like Dassai Junmai—its clean, slightly nutty profile harmonizes beautifully with the dish's umami flavors. For beer lovers, a light lager such as Asahi Super Dry provides a crisp contrast without competing.
Avoid heavy stouts or IPAs, which can overpower the delicate balance of flavors. 🍺
Fortified Wine Twist
Add complexity with a dry sherry like Fino from Spain. Its nutty, almond-like notes complement the sesame oil and beef, while the alcohol content helps cut through the richness. Serve at room temperature for the best aroma experience. This unexpected pairing elevates the dish to restaurant-quality sophistication.
Non-Alcoholic Pairings
For a refreshing non-alcoholic option, try a sparkling yuzu soda—its citrusy brightness contrasts the dish's savory depth. I also enjoy hibiscus iced tea, which adds a floral note that pairs surprisingly well with the soy and ginger flavors.
Both options keep the meal light and refreshing without detracting from the main course.
Nutrition facts
Frequently asked questions
Can I use a different cut of beef instead of chuck roast?
For similar tenderness, try stew meat or chuck shoulder. Avoid lean cuts like sirloin—they won't break down as nicely. If using brisket, increase cooking time by 5 minutes to ensure full tenderness. The key is fat content: aim for at least 15% fat for best results.
Why did my noodles turn mushy in the pressure cooker?
This happens when noodles cook too long in liquid. Add them only after pressure releases—never during cooking. For extra insurance, cook noodles 1 minute less than package instructions and finish them in the beef broth. Stirring constantly during the final 3-4 minutes of sauce thickening prevents overcooking.
How can I make this dish spicier?
Add 1-2 teaspoons of red pepper flakes when searing the beef, or stir in 1 tbsp gochujang (Korean chili paste) with the soy sauce. For heat lovers, include 1 sliced Thai chili with the aromatics. Remember: pressure cooking intensifies flavors, so start with half the amount you'd use for stovetop cooking.
Can I make this recipe in an Instant Pot?
Yes! Follow the same steps, but use the Sauté function for searing, then switch to High Pressure for 20 minutes. The Instant Pot's automatic pressure release works perfectly here. Just ensure your pot has at least 2 cups liquid before sealing—this recipe's measurements are ideal for the Instant Pot's 6-quart size.
What's the best way to reheat leftovers?
Add 2 tbsp water per serving and pressure cook for 3 minutes on high pressure. For stovetop reheating, simmer on low heat for 4-5 minutes, stirring occasionally. Never microwave—it makes noodles rubbery. Store leftovers in an airtight container for up to 5 days in the fridge.