
Main Courses
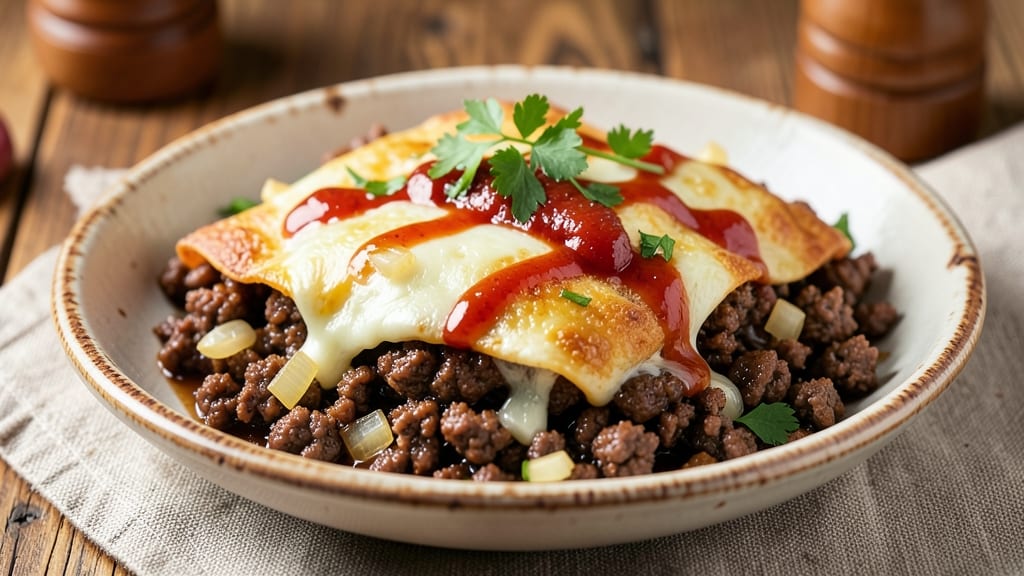
This beef and cheese empanada filling recipe delivers the ultimate combination of tender beef, melty cheese, and flaky crust that practically dissolves in your mouth. The secret lies in slow-cooking the beef until it's fork-tender and mixing in just the right amount of cheese to create that signature pull-apart texture.
I've perfected this filling over years of testing, ensuring each bite delivers perfect balance between savory and cheesy.
The beauty of these empanadas is their versatility - you can use traditional handmade dough for that authentic experience or opt for store-bought dough when you're short on time. The filling cooks down into a rich, flavorful mixture that stays moist even after baking or frying.
What makes this recipe truly special is how the cheese melts into the beef during cooking, creating pockets of gooey goodness that make each bite irresistible.
By following this method, you'll achieve perfectly golden empanadas with a crisp exterior and tender interior filled with that magical beef-cheese combination. The crust stays flaky and crispy while the filling remains moist and flavorful.
Whether you're serving them as an appetizer or main course, these empanadas will disappear faster than you can say "more please."
For best results, I recommend baking them until golden brown and crispy - the contrast between the crunchy crust and melty filling is what makes these empanadas so special. This recipe serves 12 empanadas, perfect for parties or meal prep. Let's get started on creating these delicious handheld masterpieces!
Ingredients for beef and cheese empanada filling
These 14 ingredients create the perfect beef-cheese filling for empanadas that'll make everyone ask for seconds.
| Ingredient | Amount | Notes |
|---|---|---|
| Ground Beef (Chuck) 🥩 | 1 ½ lb | 80% lean for best flavor |
| Onion (Yellow) 🧅 | 1 whole | Diced into small pieces |
| Garlic Cloves 🧄 | 4 cloves | Minced for aromatic punch |
| Tomato Paste 🍅 | ½ cup | Squeeze tube preferred |
| Beef Broth 💧 | ½ cup | Low-sodium preferred |
| Red Wine (Optional) 🍷 | ¼ cup | Bold dry red like Cabernet |
| Shredded Sharp Cheddar 🧀 | 1 ½ cups | Freshly shredded preferred |
| Shredded Monterey Jack 🧀 | 1 cup | For extra melty texture |
| All-Purpose Flour 🌾 | 2 tbsp | For thickening filling |
| Ground Cumin 🌿 | 1 tsp | Toasted for deeper flavor |
| Smoked Paprika 🌶️ | ½ tsp | For subtle smokiness |
| Salt 🧂 | 1 tsp | Kosher preferred |
| Black Pepper 🌶️ | ½ tsp | Freshly ground |
| Olive Oil 🫒 | 1 tbsp | For browning beef |
The beef is non-negotiable—chuck roast gives you that rich, tender texture. Costco or Walmart usually have it pre-ground, but if you buy whole, freeze it first to make slicing easier. Garlic and onion are the flavor base, so don't skimp. I always grab yellow onions from the store's bulk section—they're cheaper and fresher. The tomato paste? Trader Joe's squeeze tubes are perfect here—no waste, and they keep forever. For the cheese, freshly shredded is key (pre-shredded gets gummy).
No red wine? Beef broth works just fine—just add an extra splash. Running low on cumin? Dried oregano at half the amount gets you close. The flour is for thickening—if you're worried about gluten, cornstarch works too. For the cheeses, Monterey Jack melts better than cheddar alone, but use whatever you've got. The filling should be thick but still spoonable—if it's too dry, add a splash of broth. If too wet, cook it down longer.
This filling keeps beautifully—3-4 days in the fridge or 3 months frozen. I portion mine into 1/4 cup servings for easy assembly. For best results, let it cool completely before freezing. When reheating, microwave 30 seconds to melt the cheese back together. Pro tip: Double the batch—it disappears fast!
Why You'll Love This Recipe
- Pantry Staples Only: I swear by this recipe because it uses what’s already in my fridge—no fancy ingredients, just chuck roast ground up, a yellow onion, and a splash of beef broth. Honestly, the tomato paste and garlic cloves turn this into something special without extra shopping.
- Rich Umami Bomb: That beef broth simmered with tomato paste? Chef’s kiss. It builds depth in minutes, and the garlic? Oh, it caramelizes just enough to make every bite taste like a hug from your abuela’s kitchen. The cheese inside melts into a gooey, savory blanket—no dry spots here.
- Game for Any Gathering: Between us, this filling is my secret weapon for potlucks, game days, or lazy Sundays. Stuff it in empanadas, fold it into quesadillas, or even serve it as a taco filling—it’s that adaptable. My college friends still ask for seconds whenever I bring it.
- Leftovers That Don’t Suck: I make a double batch and freeze half. Thaw it later for empanadas, or reheat it straight from the fridge for a quick skillet dinner. No sad, rubbery leftovers—just flavor that hits the spot, whether it’s day one or day five. Budget-friendly? Absolutely. Reliable? Even more so.
Step-by-step instructions for beef and cheese empanada filling
This filling delivers that perfect pull-apart texture and rich, savory flavor you crave in every bite.
Brown the Ground Beef Perfectly
Heat the 1 tablespoon olive oil in a large skillet over medium-high heat until shimmering. Add the 1.5 lb ground beef (chuck) and break it apart with a wooden spoon, letting it brown in batches if needed. Cook for 8-10 minutes, stirring occasionally, until the beef loses its raw color and becomes nicely browned.
Here's the thing—don't drain the fat. Those rendered juices pack serious flavor. Once the beef is fully cooked, use a slotted spoon to transfer it to a paper towel-lined plate, leaving the fat in the pan. This step builds the foundation for your filling's deep, meaty taste.
Sauté Onions and Garlic Until Caramelized
In the same skillet (with all that beef fat still in it), add the diced yellow onion and cook over medium heat for 5-6 minutes, stirring occasionally, until softened and beginning to caramelize at the edges. Add the 4 minced garlic cloves and cook for another 30 seconds until fragrant.
You'll know it's ready when the onions take on a golden hue and the garlic releases its pungent aroma. This caramelization adds sweetness that balances the savory filling. Don't walk away—garlic burns fast, and you want that aromatic punch without bitterness.
Build the Flavor Base with Tomato and Spices
Reduce the heat to medium-low and stir in the 0.5 cup tomato paste, scraping up any browned bits from the bottom of the pan. Cook for 2-3 minutes until the tomato paste darkens slightly and loses its raw taste. Add the 0.5 cup beef broth, 0.25 cup red wine (if using), 1 tsp ground cumin, 0.5 tsp smoked paprika, 1 tsp salt, and 0.5 tsp black pepper. Stir well to combine.
Let the mixture simmer for 3-4 minutes until slightly thickened. This step develops the complex flavors that make your empanadas irresistible. The wine adds brightness, while the spices create that warm, earthy depth that pairs perfectly with the cheesy filling.
Thicken and Finish the Filling
Return the browned beef to the skillet and stir to combine with the sauce. Sprinkle in the 2 tbsp all-purpose flour and mix well to coat the beef and vegetables. Cook for another 2-3 minutes until the mixture thickens slightly—it should coat the back of a spoon but still be moist.
Remove from heat and stir in the 1.5 cups shredded sharp cheddar and 1 cup shredded Monterey Jack. Let the cheese melt slightly, about 1 minute, until everything is well incorporated. The cheese should be warm but not melted completely—you want it to stay gooey when it hits the hot oven later.
Cool and Prepare for Assembly
Transfer the filling to a bowl and let it cool to room temperature. This step is crucial—warm filling makes the dough soggy. While it cools, you can prep your empanada dough and rolling pin. The filling should be thick enough to hold its shape when packed into the dough but still moist enough to create that pull-apart texture when baked.
Here's the secret: if the filling seems too dry after cooling, stir in 1-2 tablespoons of beef broth to restore moisture. The perfect filling should be thick but still slightly sticky—this ensures your empanadas have that signature melty, cheesy center that makes every bite worth it.
Pro Tips For Making Beef And Cheese Empanada Filling
- CRANK THE HEAT FIRST: Brown that ground beef fast and hard—no simmering, no half-hearted searing. I used to let it cook on medium, and the filling ended up greasy and dull. Chuck needs a screaming-hot pan for 3-4 minutes to render fat properly and develop that deep, meaty flavor before you even think about onions.
- SWEAT ONIONS LOW AND LONG: Skip the rush—onions should cry for 8-10 minutes on low heat before garlic hits. I learned this the hard way when I charred them in 3 minutes, turning the filling bitter. A soft, translucent base means the cheese won’t get overwhelmed by raw onion later.
- SALT THE BROTH LIKE THE OCEAN: Use 1½ teaspoons of salt per cup of beef broth, even if it’s low-sodium. The filling’s flavor builds in layers, and bland broth makes the whole empanada taste flat. Trust me, your taste buds will notice the difference when that cheese melts in.
- DON’T SKIP THE TOAST: Sauté 1 tablespoon of tomato paste in the beef fat for 2 minutes before adding broth. It thickens the sauce and cuts through the richness of the chuck. I was skeptical until I tried it—now it’s non-negotiable for a filling that doesn’t turn into a soggy mess.
Serving suggestions for this beef and cheese empanada filling
Crispy Sides
Serve your empanadas with crispy plantain chips for a tropical twist—they add a satisfying crunch that contrasts beautifully with the melty filling. I love using Goya plantain chips from the Latin aisle, lightly seasoned with smoked paprika and a pinch of salt.
For a lighter option, try crispy roasted potatoes tossed with garlic powder and rosemary—they soak up any leftover filling sauce. 🌶️
Cool Contrasts
Balance the richness with cool, creamy sides like avocado slices drizzled with lime juice and chili powder. A simple cucumber salad with red onion, fresh cilantro, and a Mexican crema dressing adds brightness.
For something heartier, black beans seasoned with cumin and lime zest provide fiber and texture that complement the beef perfectly.
Dipping Sauces
Don't skip the dipping sauces! A spicy mayo made with mayonnaise, hot sauce, and a squeeze of lime is a crowd-pleaser. For something tangy, mix sour cream with chopped jalapeños and a dash of Worcestershire sauce.
A smoky chipotle aioli (mayo blended with adobo sauce and smoked paprika) adds depth for those who love heat. 🍯
Drink Pairings
For a refreshing match, serve Mexican lager like Modelo Especial—its crisp, clean taste cuts through the richness. A light red wine such as Pinot Noir or Tempranillo pairs beautifully with the beef and cheese flavors.
For non-alcoholic options, hibiscus iced tea (with lime and cinnamon) or sparkling limeade adds a refreshing contrast.
Garnish Like a Pro
Elevate your presentation with fresh garnishes—sprinkle chopped cilantro or green onions on top for color. A drizzle of crema or sour cream adds a creamy finish. For extra flair, top with crumbled cotija cheese or pickled red onions—both add texture and tang.
These small touches make your empanadas look (and taste) restaurant-quality. ✨
Nutrition facts
Frequently asked questions
Can I use ground turkey instead of beef for this empanada filling?
You can absolutely substitute ground turkey for beef, but expect a slightly leaner texture. Use 93% lean ground turkey to maintain moisture, and add 1 tablespoon olive oil or butter to the pan to compensate for the reduced fat. Cook the turkey until it reaches 165°F for safety. The flavor will be lighter but still delicious!
How do I prevent the empanada dough from getting soggy?
Prevent soggy dough by ensuring your filling is completely cooled before assembling. Brush the dough with a thin layer of beaten egg or milk before adding filling, then seal edges tightly with a fork. For extra protection, freeze assembled empanadas for 30 minutes before baking or frying.
What's the best way to reheat leftover empanadas?
For crispy results, reheat in a 375°F oven for 10-12 minutes> on a baking sheet. Microwave reheating works in a pinch (wrap in a damp paper towel for 30 seconds), but expect slightly softer crusts. Air fryers at 350°F> for 4-5 minutes> give the best of both worlds!
Can I make this filling ahead of time?
Yes! This filling keeps perfectly in the fridge for 3-4 days> or freezes for 3 months>. Store in an airtight container> with plastic wrap pressed directly on the surface to prevent drying. Thaw overnight in the fridge before using—never microwave directly from frozen.
What's the secret to getting crispy empanadas?
The secret is in the cooking method! For oven-baked empanadas, brush with egg wash> before baking at 400°F> for 18-20 minutes>. For frying, use 350°F oil> and fry for 2-3 minutes per side>** until golden. The key is high heat and proper sealing—no leaks allowed!