
Main Courses
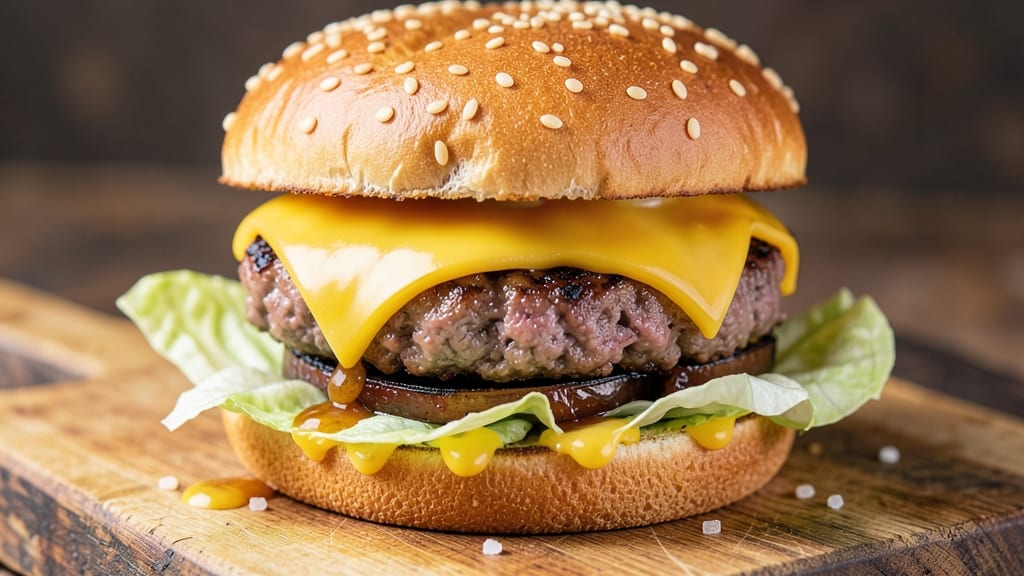
A beef and cheese burger recipe that delivers the perfect balance of juicy beef, molten cheese, and a charred crust is what transforms a simple meal into a memorable experience.
The secret lies in using high-quality ground beef and the right cooking technique to ensure the cheese melts into rivers while the patty stays tender. This isn't just another burger recipe—it's a game-changer for anyone who loves that first bite of gooey, savory perfection.
Start with a well-seasoned beef patty, formed just slightly thicker in the center to account for shrinkage. The key to that iconic charred crust is searing the patty over medium-high heat for just a few minutes per side, then adding your cheese of choice when it's nearly done.
As the cheese melts, it creates those irresistible rivers that make every bite worth it. This method ensures your burger stays juicy inside while achieving that satisfying crisp on the outside.
Assembling the burger with a soft, toasted bun, fresh lettuce, and your favorite condiments elevates it from ordinary to extraordinary. The cheese doesn't just melt—it transforms the burger into a decadent, restaurant-quality dish that's impossible to resist.
Whether you're grilling outdoors or cooking on the stovetop, this recipe delivers results that will have everyone asking for seconds.
Pair your beef and cheese burger with classic sides like crispy fries, a fresh garden salad, or pickles for that perfect tangy contrast. The beauty of this recipe is its versatility—it works for casual weeknight dinners or as the star of a backyard barbecue.
Let's get started on creating a burger that's as delicious as it is satisfying.
Ingredients for beef and cheese burger
High-quality beef, gooey cheese, and fresh toppings—this is your game-changing burger lineup.
| Ingredient | Amount | Notes |
|---|---|---|
| Ground Beef (80/20) 🥩 | 1 ½ lb | Freshly ground for best flavor |
| Shredded Cheddar Cheese 🧀 | 1 cup | Medium or sharp variety preferred |
| Large Hamburger Buns 🍞 | 4 whole | Soft, toasted before serving |
| Yellow Onion 🧅 | 1 whole | Thinly sliced for topping |
| Fresh Lettuce Leaves 🥬 | 4 whole | Iceberg or romaine preferred |
| Kosher Salt 🧂 | 1 ½ tsp | Diamond Crystal preferred |
| Ground Black Pepper 🌶️ | 1 tsp | Freshly ground for best flavor |
| Garlic Powder 🧄 | 1 tsp | For seasoning the patty |
| Vegetable Oil 🫒 | 2 tbsp | For greasing the grill or pan |
| Mayonnaise 🥛 | ¼ cup | For condiment spread |
| Yellow Mustard 🟡 | 2 tbsp | For condiment spread |
| Ketchup 🍅 | 2 tbsp | For condiment spread |
| Butter 🧈 | 2 tbsp | Unsalted for toasting buns |
The beef is everything here. 80/20 ground chuck from the butcher section delivers that perfect fat-to-lean ratio for juicy, flavorful patties. Costco or local butcher counters usually have the freshest cuts—look for bright red color and good marbling. If you're using pre-packaged ground beef, grab it the day you plan to cook. The cheese? Sharp cheddar melts best, but medium works too. Avoid pre-shredded cheese—the anti-caking agents make it less gooey. For the buns, Briess or Sara Lee are reliable brands, but any soft, fresh bun will do.
No cheddar? Monterey Jack or pepper jack are great substitutes—they melt beautifully too. Running short on toppings? Caramelized onions or sautéed mushrooms add depth without extra effort. The condiments are flexible: swap mayo for aioli or Greek yogurt if you prefer lighter options. For the patty seasoning, smoked paprika or a pinch of cayenne adds a smoky kick. If you're grilling, use charcoal or propane for that authentic charred crust—cast iron on the stovetop works too if you're indoors. Just make sure your grill or pan is screaming hot before adding the patties.
Prep the toppings ahead to save time. Slice the onions and lettuce, mix your condiments, and shred the cheese—everything stays fresh in the fridge for 2-3 days. The ground beef can be shaped into patties up to 1 day ahead and refrigerated. For leftovers, store patties and toppings separately. Reheat patties in a skillet for 1-2 minutes per side to restore that crispy crust. Cheese reheats best in the microwave for 10-15 seconds. Assemble burgers fresh off the heat so the buns stay soft and the cheese stays melty.
Why You'll Love This Recipe
- No Fuss, Big Payoff: I swear by the 80/20 ground beef here—just salt, pepper, and a quick sear. The fat renders into crispy edges while keeping that juicy center, and the cheddar melts into gooey perfection with zero effort. Honestly, I’ve made burgers that took three times as long for half the satisfaction.
- Cheese That Wins: That moment when the cheddar stretches over the beef like a golden blanket? Chef’s kiss. The sharpness cuts through the richness of the beef, and the onions add just enough bite to keep it from being too heavy. (Yes, even on a Tuesday night when I’m craving something that feels like a hug.)
- Lunchbox Hero: Between us, these burgers are my secret weapon for meal prep. Assemble them fresh, wrap tightly, and they hold up beautifully for lunches—no sad, mushy sandwiches here. The lettuce stays crisp, the cheese stays melty, and the buns? Still soft enough to eat with your eyes closed.
- Budget That Doesn’t Skimp: Ground beef and chedddar are my go-to for stretching a dollar without sacrificing flavor. A single pound of 80/20 makes four hearty patties, and the onions and lettuce add freshness without costing a fortune. I’ll be real: my grocery bill thanks me every time I make these.
Step-by-step instructions for beef and cheese burgers
Here's how to craft juicy, melty cheese burgers with a perfect char—every bite delivers that satisfying contrast of crisp crust and gooey center.
🍳 Step 1: Season and Form the Patties
Divide the 1.5 lb ground beef (80/20) into four equal portions, each weighing about 3.75 ounces. I press each portion into a ball and gently flatten it into a ¾-inch thick patty using my fingers—this creates a nice surface area for searing without making them too thick. The 80/20 fat ratio is crucial here; it keeps the burgers juicy while still allowing for a good sear.
Season each patty generously with 1.5 tsp kosher salt, 1 tsp ground black pepper, and 1 tsp garlic powder, pressing the spices into both sides. Don't skip this step—even distribution ensures every bite is flavorful. Let the patties rest for 10 minutes at room temperature before cooking. This prevents them from releasing moisture too quickly when they hit the hot surface, which would make them tough.
🔥 Step 2: Cook the Patties to Medium Rare
Heat 2 tbsp vegetable oil in a large skillet over medium-high heat until it shimmers. Add the patties and cook for 3-4 minutes per side for medium-rare doneness, or until they reach an internal temperature of 130-135°F. You'll know they're ready when they develop a deep golden-brown crust and the edges start to pull away slightly from the pan. I press down gently on the patties during the first minute to prevent them from curling and ensure even contact with the pan.
For the cheese effect, place ¼ cup shredded cheddar cheese (about 2 tbsp per patty) on one side of each patty during the last 30 seconds of cooking. The residual heat will melt the cheese perfectly, creating those signature rivers of gooey goodness. If the cheese doesn't melt completely, cover the skillet with a lid for 10-15 seconds to trap the heat.
🥘 Step 3: Toast the Buns and Assemble the Burgers
While the patties cook, melt 2 tbsp butter in a clean skillet over medium heat. Toast each hamburger bun for 1-2 minutes per side until golden brown and crisp. The butter adds richness and helps create that perfect toasted texture. Keep the toasted buns warm in a 200°F oven while you assemble the burgers.
Spread 1 tbsp mayonnaise, ½ tbsp yellow mustard, and ½ tbsp ketchup on the bottom half of each bun. Layer with 1 thinly sliced yellow onion and 1 fresh lettuce leaf, then top with a cheeseburger patty. Repeat with the remaining toppings and buns. The key here is to work quickly—cheeseburgers are best served immediately while the patties are still warm and the cheese is melty.
🍽️ Step 4: Serve and Enjoy Immediately
Cut each burger in half diagonally and serve right away. The patties should be juicy inside with a crisp exterior, and the cheese should be melted but not runny. The toasted buns provide the perfect contrast to the tender meat and rich toppings. Pair with a side of crisp lettuce or a fresh tomato slice to balance the richness of the beef and cheese.
Real talk: Don't skip the resting step for the patties. If you cut into them too soon, all those juices will escape, leaving you with a dry burger. Let them rest for 2-3 minutes after cooking to lock in all that flavor. Each bite should deliver that perfect harmony of charred crust, melty cheese, and juicy beef—this is the moment that matters.
Pro Tips For Making Beef And Cheese Burger
- USE A HOT SKILLET: High heat is non-negotiable for that perfect crust—get your pan screaming hot before adding the patties, or you’ll end up with a sad, gray, greasy mess instead of a caramelized masterpiece. I learned this the hard way after making burgers that tasted more like beefy hockey pucks than anything else.
- SALT THE CHEESE: Toss that shredded cheddar in a bowl with a pinch of salt and a drizzle of water before melting it on the burger. The salt enhances the flavor, and the moisture keeps it from turning into a dry, clumpy disaster—especially if you’re using pre-shredded cheese from the bag.
- DON’T OVERHANDLE THE BEEF: Resist the urge to press or shape the patties too much—gentle is the way. Overworking the meat makes burgers dense and tough, and they’ll lose that juicy, tender texture you’re after. Form them loosely, then let them keep their shape naturally.
- TOAST THE BUNS LAST: Skip toasting the buns until the very end—right before assembling the burger. Warm buns get soggy fast, and if you toast them too early, they’ll turn into brittle, flavorless shells by the time you’re ready to eat. A quick 30-second toast in the same pan as the burgers works perfectly.
Flavor customization for beef and cheese burger
Spice Level Boost
For a kick, add ½ tsp smoked paprika and ¼ tsp cayenne pepper to your seasoning mix. The smoked paprika adds depth while the cayenne brings heat—just enough to wake up your taste buds without overpowering the beef.
For an extra punch, sprinkle ½ tsp crushed red pepper flakes directly on the patty before adding cheese. 🌶️
Cheese Variations
Swap out cheddar for pepper jack if you want a spicy kick, or try blue cheese crumbles for a bold, tangy twist. For a smoky flavor, use smoked gouda—it melts beautifully and adds depth.
If you're feeling fancy, layer provolone and Swiss for a creamy, nutty combination that never fails.
Umami Bomb
Add 1 tsp Worcestershire sauce to your patty seasoning for an instant umami boost. Or, mix 1 tbsp soy sauce into the beef before forming patties—it enhances the beef flavor without overpowering it. For extra richness, top your cheese with 1 tbsp caramelized onions before the final sear.
Sweet Heat Combo
Drizzle 1 tbsp honey or maple syrup over the patty during the last minute of cooking for a sweet contrast to the savory cheese. Pair it with spicy brown mustard** instead of regular mustard for a perfect sweet-spicy balance.
This combo is a crowd-pleaser that elevates your burger to next-level deliciousness.
Herb Infusion
Mix 1 tsp dried thyme or 1 tbsp finely chopped fresh chives into your patty seasoning for an herbal twist. Fresh herbs like cilantro or dill also work well—just chop them finely and sprinkle on top of the cheese before the final sear.
The bright, fresh notes cut through the richness beautifully.
Global Flavors
Transform your burger into a Bulgogi-style by marinating the beef in 2 tbsp soy sauce, 1 tbsp brown sugar, and 1 tsp sesame oil before forming patties. For a Mexican twist, top with avocado slices, pico de gallo, and cotija cheese.
A Mediterranean-inspired version swaps cheese for feta and adds kalamata olives and tzatziki.
Nutrition facts
Frequently asked questions
Why does my cheese burger patty turn out dry?
Overworking the beef or cooking it too long are the usual culprits. Use 80/20 ground chuck and form patties gently—don't press them flat. Cook over medium-high heat for 3-4 minutes per side only, then let them rest for 2-3 minutes before cutting. The fat in 80/20 keeps it juicy, and resting locks in the moisture.
Can I make these burgers ahead of time?
Shape the patties and store them on a tray in the fridge for up to 24 hours. Toast the buns fresh, but keep toppings separate until serving. Reheat patties in a skillet for 1-2 minutes per side to restore the crust, then add cheese to melt it fresh. The buns should always be toasted last to stay soft.
What's the best cheese for melting?
Sharp cheddar is the classic choice, but Monterey Jack melts even more smoothly. Avoid pre-shredded cheese—the anti-caking agents prevent proper melting. For extra gooeyness, try provolone or pepper jack. Place cheese on the patty during the last 30 seconds of cooking, or cover the pan for 10-15 seconds to trap heat.
How do I get that perfect charred crust?
Heat your pan or grill to medium-high heat until it's screaming hot. Add 2 tbsp vegetable oil and let it shimmer before placing patties. Press down gently for the first 30 seconds to prevent curling, then let them sear undisturbed. For a grill, use charcoal or propane—cast iron on the stovetop works too if you preheat it properly.
Can I make these burgers without a grill?
No problem! A heavy cast iron skillet works perfectly. Heat it over medium-high heat until hot, then add 2 tbsp oil. Cook patties for 3-4 minutes per side for medium-rare. For extra crispiness, finish under the broiler for 30 seconds after adding cheese. The skillet gives you excellent control over the sear and cheese melt.