
Sauces & Condiments
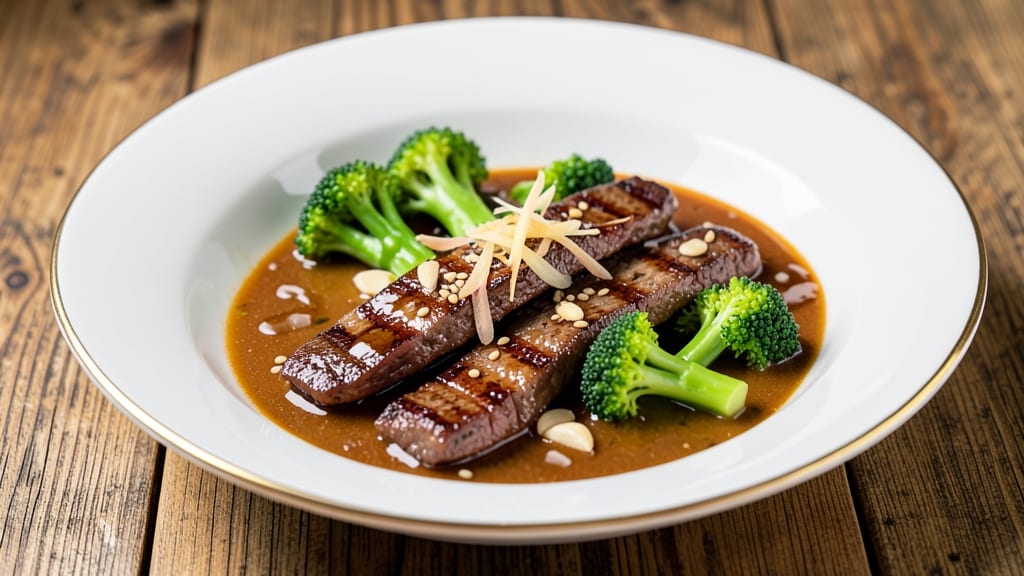
This authentic beef and broccoli sauce delivers the same umami-packed wok gloss you crave from Chinese takeout—but with restaurant-quality depth you won’t find in store-bought bottles.
The secret lies in balancing sweet, salty, and savory elements through careful simmering, where soy sauce, oyster sauce, and a touch of sugar meld into a glossy, aromatic sauce that clings perfectly to beef and broccoli.
What sets this sauce apart is the layered flavor development: garlic and ginger bloom in hot oil before being deglazed with a splash of Shaoxing wine, creating a fragrant base.
The sauce then reduces slowly, allowing the soy and oyster sauces to caramelize slightly while cornstarch thickens it into that signature glossy finish. No shortcuts—just authentic technique that transforms simple pantry staples into something extraordinary.
The result is a sauce that’s rich yet balanced, with a perfect harmony of sweetness from sugar, saltiness from soy, and umami depth from oyster sauce. It’s the kind of sauce that elevates any dish—whether tossed with stir-fried beef and broccoli or drizzled over noodles.
The best part? It comes together in just 20 minutes with minimal effort, making it ideal for weeknight dinners or meal prep.
Once made, this sauce keeps beautifully in the fridge for up to 5 days, allowing you to batch-cook and enjoy the flavors throughout the week. The instructions walk you through every step to ensure you achieve that glossy, restaurant-style finish without any guesswork.
Let’s get started on creating sauce that tastes like it’s straight from a wok.
Ingredients for authentic beef and broccoli sauce
Nine simple ingredients transform into that signature glossy sauce you crave from takeout.
| Ingredient | Amount | Notes |
|---|---|---|
| Vegetable Oil 🫒 | ¼ cup | High smoke point preferred |
| Garlic Cloves 🧄 | 6 cloves | Minced finely for aroma |
| Fresh Ginger 🌿 | 1 tbsp | Grated, not powdered |
| Shaoxing Wine 🍷 | ¼ cup | Dry Chinese cooking wine |
| Light Soy Sauce 🧂 | ½ cup | Not dark or tamari |
| Oyster Sauce 🦪 | ¼ cup | High-quality, not imitation |
| Granulated Sugar 🍚 | 1 tbsp | White or brown sugar |
| Cornstarch 🌾 | 1 tbsp | For thickening slurry |
| Water 💧 | ¼ cup | For cornstarch slurry |
The garlic and ginger are non-negotiable here. Fresh is a must—powdered won't give that aromatic punch. Whole Foods or Asian markets have the best quality, but the grocery store works too if you grab them fresh. Shaoxing wine adds depth, but dry sherry in a pinch works if you're in a bind. The oyster sauce? Lee Kum Kee is the gold standard—don't skimp on this one. It's what gives that umami richness. If you're worried about price, buy the smaller bottles since you won't use it all at once.
No Shaoxing wine? Dry sherry or even a splash of mirin will do, though the flavor won't be identical. Light soy sauce is key—dark soy sauce will make the sauce too dark. The cornstarch slurry is your secret weapon for that glossy finish. Mix it well before adding to avoid clumps. Sugar balances the saltiness, but if you're watching carbs, you can reduce it to 1 teaspoon. The water in the slurry should be cool—hot water activates the cornstarch too fast.
This sauce keeps beautifully in the fridge for 5 days in an airtight container. The flavors actually deepen overnight, so making a double batch is worth it. If you're prepping for the week, freeze portions in ice cube trays—just thaw and reheat. Reheat gently on low heat or in the microwave with a splash of water to restore that glossy texture. It reheats like a dream, so don't hesitate to make extra.
Why You'll Love This Recipe
- No-Fuss Stir-Fry: I swear by this sauce—just a few minutes of chopping, a quick sear, and the Shaoxing wine does all the work. The ginger and garlic sing when they hit the hot oil, and the soy sauce ties it all together without fuss. Honestly, it’s the kind of dish that makes me feel like I’ve earned my dinner.
- Umami Bomb: That first sip of sauce—sweet from the wine, salty from the soy, with a bright kick of fresh ginger—it’s ridiculously good. The beef stays tender but chewy, and the broccoli? Crisp-tender perfection. Between us, this is the kind of flavor that makes takeout feel like a waste.
- Weeknight & Potluck Hero: I make this for busy nights because it’s ready in 20 minutes, but it also impresses at dinner parties. Double the batch, and you’ve got leftovers for lunch or a last-minute dish to bring. (Yes, even on a Tuesday night—no one needs to know it’s your go-to.)
- Budget-Friendly Staple: Vegetable oil and soy sauce are cheap, but they pack a punch. A little wine and ginger stretch the flavor far, and the beef doesn’t need to be fancy—just tender. I’ve fed a crowd for under $15, and everyone asks for seconds. That’s my kind of secret weapon.
Step-by-step instructions for authentic beef and broccoli sauce
Here's how to build that signature glossy, umami-rich sauce from scratch—no shortcuts, just pure wokhouse flavor.
Bloom the Aromatics in High Heat
Heat the 0.25 cup vegetable oil in a wok or large skillet over high heat until it shimmers. Add the 6 cloves minced garlic cloves and 1 tablespoon grated fresh ginger, stirring constantly for 30 seconds—you want them to sizzle and turn fragrant, not burn. The high heat releases their full aroma without turning bitter.
Here's the thing—don't walk away. Garlic burns in seconds, and that bitter flavor will ruin your sauce. Keep your eyes on the pan and stir like you're conducting a symphony. When the garlic turns golden and smells heavenly, you're ready for the next step.
Deglaze with Shaoxing Wine
Pour in the 0.25 cup Shaoxing wine and immediately scrape up any browned bits from the bottom of the pan with a wooden spoon. This deglazing step captures all that concentrated flavor that would otherwise stick to your wok. Let the wine simmer for 1-2 minutes until it reduces by about half and the alcohol smell dissipates completely.
This reduction step is crucial—it concentrates the wine's flavor and removes the harsh alcohol taste that would overpower your sauce. If you rush this, you'll end up with a sauce that tastes raw and sharp instead of rich and balanced.
Build the Umami Base
Add the 0.5 cup light soy sauce, 0.25 cup oyster sauce, and 1 tablespoon granulated sugar. Stir well and bring to a gentle simmer over medium-high heat. Let it cook for 3-4 minutes until the sauce thickens slightly and coats the back of a spoon. Taste it now—you should get a perfect balance of salty, sweet, and umami flavors.
I know it seems weird to add sugar to a savory sauce, but trust me—it cuts through the saltiness and balances the deep umami from the oyster sauce. If your sauce tastes too salty at this point, don't panic. The cornstarch slurry will help adjust the consistency and balance the flavors as you finish.
Thicken with Cornstarch Slurry
In a small bowl, whisk together the 1 tablespoon cornstarch and 0.25 cup water until completely dissolved. This is your thickening agent, and you want it smooth as silk. Pour it into the simmering sauce and stir constantly for 1-2 minutes until the sauce reaches your desired glossy consistency.
The sauce should coat the back of a spoon but still be pourable. If it's too thick, add a splash of hot water. If it's too thin, let it simmer a bit longer. This is where you fine-tune the texture—you want that signature wok sauce gloss that clings beautifully to beef and broccoli.
Finish with Perfect Timing
Remove the sauce from heat and let it sit for 1 minute to thicken slightly more. Taste and adjust seasoning if needed—you might want to add a touch more soy sauce for saltiness or a pinch of sugar if it needs sweetness. The sauce should be glossy, balanced, and ready to coat your beef and broccoli perfectly.
Here's where it gets fun—this sauce is incredibly versatile. Use it immediately with your beef and broccoli, or store it in the fridge for up to 3 days in an airtight container. When you're ready to use it again, just reheat gently and adjust the consistency with a splash of water if needed.
Pro Tips For Making Authentic Beef And Broccoli Sauce
- STIR-FRY IN BATCHES: I learned this the hard way—crowding the pan turns beef and broccoli into soggy mush. Cook half the beef first, push it to one side, then add the rest to the empty space. That way, the meat gets a proper sear without steaming.
- GINGER: GRATE, DON’T CHOP: Thin slices of ginger burn before they release flavor. Use a microplane or the finest grater—just a teaspoon of zest is enough. It blends into the sauce smoothly, and you won’t waste time fishing out chunks.
- SHAOXING WINE: DEGLAZE AGGRESSIVELY: Don’t just splash it in—scrape the browned bits from the pan first. That’s where the flavor lives. Add the wine, let it bubble for 30 seconds, then add soy sauce. The sauce will be richer, and you’ll taste the difference.
- BROCCOLI: SALT THE WATER: Skip the raw florets straight into the pan—they’ll steam instead of caramelize. Blanch them in salted boiling water for 30 seconds first, then shock in ice water. They’ll stay vibrant and crisp, not turning to mush when they hit the sauce.
Perfect pairings for this dish
Sauce for Rice Bowls
This glossy sauce transforms simple white rice into a flavor-packed base. Spread 2-3 tablespoons of sauce over steamed jasmine rice and top with grilled shrimp, avocado slices, and sesame seeds.
The umami depth cuts through the rice's mild flavor while adding a restaurant-quality touch. For extra richness, drizzle with chili oil or fried shallots before serving. 🍚
Noodle Drizzle
Toss 8 ounces of cooked ramen or udon noodles with 1-2 tablespoons of sauce and a splash of hot water to restore that glossy sheen. Garnish with green onions and toasted sesame seeds for a quick, satisfying meal.
The sauce's balance of sweet and salty elevates simple noodles to takeout-level deliciousness. I often double the batch just to have it ready for noodle nights.
Protein Glaze
Use this sauce as a finishing glaze for grilled chicken, pork tenderloin, or tofu. Brush 1-2 tablespoons onto proteins during the last 5 minutes of cooking to create a caramelized crust.
The sauce's glossy texture makes it perfect for basting—just keep a small bowl nearby to dip your brush each time. 🍗
Vegetable Stir-Fry
Toss bell peppers, snap peas, and mushrooms in a hot wok with 1 tablespoon oil, then add 2 tablespoons of sauce at the end. The sauce clings beautifully to vegetables, adding a savory-sweet coating.
Serve with steamed rice or crispy noodles for a complete meal. This works especially well with bok choy or baby corn.
Dipping Sauce
Thin the sauce with 1-2 tablespoons of hot water to create a dipping sauce for spring rolls, potstickers, or fried dumplings. The reduced version adds depth to crispy textures while keeping the sauce's signature balance.
For extra tang, add ½ teaspoon of rice vinegar or sriracha to taste. 🥟
Garnish Ideas
Elevate your dish with fresh cilantro, green onions, or crushed peanuts. A sprinkle of sesame seeds adds texture, while chili crisp or sliced jalapeños bring heat.
For a finishing touch, drizzle with toasted sesame oil just before serving. These garnishes balance the sauce's richness and add visual appeal.
Nutrition facts
Frequently asked questions
Can I substitute Shaoxing wine in this sauce?
Yes, but the flavor will differ slightly. Use dry sherry or mirin as substitutes—both work well, though Shaoxing wine's unique depth is hard to replicate. For a non-alcoholic option, try apple cider vinegar or rice vinegar (reduce by half) to mimic the acidity. The sauce will still taste great, just with a different profile.
Why does my sauce turn out too thick or too thin?
Thickness depends on the cornstarch slurry. If it's too thick, add 1-2 teaspoons of hot water and stir. Too thin? Simmer uncovered for 1-2 extra minutes to reduce. For perfect consistency, whisk the cornstarch slurry until completely smooth before adding—clumps cause uneven thickening. The sauce should coat the back of a spoon but still be pourable.
How do I make this sauce less salty?
If your sauce tastes too salty, balance it with ½ teaspoon of sugar or a splash of water to dilute. For a more dramatic fix, add 1 teaspoon of honey or rice vinegar to cut through the saltiness. The sugar in the original recipe already helps balance flavors, but if you used extra soy sauce, these adjustments will save your sauce.
Can I make this sauce ahead of time?
This sauce actually tastes better the next day as the flavors meld. Store it in an airtight container in the fridge for up to 5 days. When reheating, warm gently on the stove over low heat and add a splash of water if it thickens too much. For longer storage, freeze portions in ice cube trays—thaw and reheat as needed.
What’s the secret to getting that glossy, restaurant-style finish?
The gloss comes from two key steps: high heat when cooking the aromatics and cornstarch slurry added at the right time. Simmer the sauce uncovered for 3-4 minutes before adding the slurry, then stir constantly until it thickens. For extra shine, finish with a drizzle of toasted sesame oil or a pinch of sugar to caramelize slightly.