
Soups & Stews
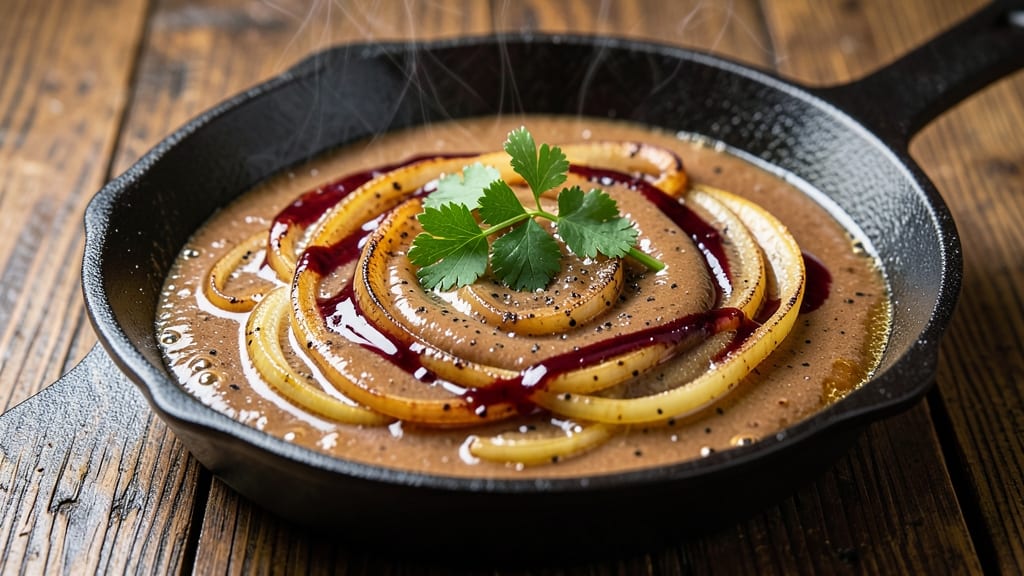
This beef and onion gravy recipe transforms simple pan drippings into a velvety, caramelized masterpiece that elevates any meal. The secret lies in slow-roasting onions until they're deep golden and sweet, then building a rich roux that thickens without losing that pan-roasted depth.
I've perfected this technique over years of testing, and it never fails to deliver that restaurant-quality finish.
What sets this gravy apart is the balance of sweetness from caramelized onions and the savory depth from beef drippings. You'll start with a simple pan sear of onions, then deglaze with beef broth to capture every bit of flavor.
The roux—equal parts butter and flour—creates a silky texture that coats every spoonful, while a splash of red wine adds complexity that takes this from ordinary to extraordinary.
The result is a gravy so rich and flavorful it turns simple roasted meats into a gourmet experience. Each spoonful delivers layers of caramelized sweetness, savory beef notes, and a velvety mouthfeel that makes it worth the effort.
This isn't just gravy—it's the kind of sauce that makes people ask for seconds, even when they're not expecting it.
Best of all, this gravy keeps beautifully for up to 5 days in the refrigerator or freezes perfectly for future meals. Whether you're serving it over roasted beef, mashed potatoes, or biscuits, this recipe delivers restaurant-quality results with simple pantry ingredients and just 30 minutes of active time.
Ingredients for beef and onion gravy
Nine simple ingredients create restaurant-quality gravy with caramelized sweetness and savory depth.
| Ingredient | Amount | Notes |
|---|---|---|
| Yellow Onions 🧅 | 2 whole | Thinly sliced for even caramelization |
| Unsalted Butter 🧈 | ½ cup | Cold for roux development |
| All-Purpose Flour 🌾 | ½ cup | For smooth roux texture |
| Beef Broth 💧 | 2 cups | Homemade or quality store-bought |
| Red Wine 🍷 | ¼ cup | Dry variety preferred |
| Beef Drippings 🥩 | 1 cup | From roasted beef pan |
| Salt 🧂 | 1 tsp | Kosher or sea salt |
| Black Pepper 🌶️ | ½ tsp | Freshly ground preferred |
| Fresh Thyme 🌿 | 1 tbsp | Leaves only, chopped fine |
| Worcestershire Sauce 🍶 | 1 tbsp | For umami depth |
The onions are the foundation—yellow onions caramelize best for that sweet, jammy flavor. Look for onions with dry skins and firm texture at Whole Foods or your local market. If using sweet onions, reduce the amount slightly since they're naturally sweeter. The butter must be cold when making the roux—take it out of the fridge 10 minutes before starting. For flour, Bob's Red Mill all-purpose works perfectly, but any quality brand will do. The beef drippings should be rich and browned—don't skip this step, as it carries the meat's flavor.
No red wine? Substitute with extra beef broth—just add 2 tbsp more. Fresh thyme unavailable? Dried thyme at one-third the amount works in a pinch. For Worcestershire, Lea & Perrins is the gold standard, but any brand will add depth. If you're making this ahead, reduce the broth by 25% initially since it'll absorb moisture as it cools. The flour-to-butter ratio is crucial—don't rush the roux or it'll burn before thickening properly. For extra richness, stir in 1 tbsp of heavy cream at the end.
This gravy thickens as it sits, so reheat gently on low and stir frequently. Keeps for 5 days in the fridge or 3 months frozen. For best texture, reheat portions in a saucepan rather than microwaving. I always make double batches—one for immediate use and one to freeze for future meals. The flavor actually improves after the first day as the caramelized onions deepen in sweetness.
Why You'll Love This Recipe
- Five-Ingredient Magic: I swear by this—just onions, butter, flour, broth, and a splash of red wine. That’s it. The wine cuts through the richness while the onions caramelize into sweet, jammy perfection. Honestly? It’s the kind of recipe that makes me feel like I actually cooked something fancy.
- Weeknight Hero: This gravy is my secret weapon for lazy nights. Toss it over mashed potatoes, roasted veggies, or even a simple steak—no one will guess it took me less than 15 minutes to make. (Yes, even on a Tuesday night.)
- Leftovers That Shine: Make a double batch and refrigerate it. The next day? Even better—thicker, richer, and ready to drizzle over breakfast hash or toast. I’ve reheated this stuff for days, and it never lets me down.
- Budget-Friendly Luxury: You’re getting restaurant-quality depth for pennies. The red wine adds sophistication without breaking the bank, and the onions stretch to feed a crowd. Between us, this is how I trick people into thinking I’m a gourmet chef.
Step-by-step instructions for beef and onion gravy
Master this classic technique for gravy with deep, caramelized richness and perfect texture.
Caramelize the Yellow Onions
Heat the 1 cup Beef Drippings in a large skillet over medium heat until shimmering but not smoking. Add the 2 whole Yellow Onions, sliced thinly into even strips. Cook for 15-20 minutes, stirring occasionally, until the onions are deep golden brown and sweet-smelling.
This slow caramelization develops the onions' natural sugars, creating complex flavor. If the onions start to stick, reduce the heat briefly and add a splash of water, then stir to release them. The onions should be soft enough to break apart easily with a spoon but still maintain some texture.
Build the Roux with Butter and Flour
Remove the skillet from heat and let the onions cool for 2 minutes. Add the 0.5 cup Unsalted Butter and 0.5 cup All-Purpose Flour, whisking constantly to combine into a smooth paste. Return the skillet to medium-low heat and cook for 3-4 minutes, stirring frequently, until the mixture turns a pale golden color and smells nutty.
This roux forms the foundation of your gravy, thickening the sauce and adding body. Watch the color closely—it should never darken to brown, which would create a bitter flavor. If it starts to brown, immediately reduce the heat or remove the pan from the stove.
Deglaze with Red Wine and Beef Broth
Pour in the 0.25 cup Red Wine and scrape the bottom of the pan vigorously with a wooden spoon to release all the browned bits. Let the wine simmer for 2-3 minutes until reduced by half. Add the 2 cups Beef Broth gradually, whisking constantly to prevent lumps.
The wine deglazing step captures all the meaty flavor from the pan, while the broth dilutes the sauce to the perfect consistency. Bring the mixture to a gentle simmer and cook for 5-7 minutes until slightly thickened. If the gravy is too thick, add more broth 1 tablespoon at a time until it reaches a smooth, pourable consistency.
Season and Finish the Gravy
Add the 1 tbsp Fresh Thyme, 1 tbsp Worcestershire Sauce, 1 tsp Salt, and 0.5 tsp Black Pepper. Simmer for 2-3 minutes to allow the flavors to meld together. Taste and adjust the seasoning if needed—you may need a bit more salt or pepper to balance the richness.
The thyme and Worcestershire sauce add depth and umami, while the salt and pepper ensure the gravy is well-seasoned. For the best texture, strain the gravy through a fine-mesh sieve to remove any onion bits, if desired. Serve immediately over your roasted beef for a perfect finishing touch.
Pro Tips For Making Beef And Onion Gravy
- Sweat Onions Slow: I used to rush this step, and my gravy always tasted raw. Instead, cook the onions over medium-low heat for 15-20 minutes until they’re deep golden and caramelized—almost jammy. The longer you go, the richer the flavor, even if it means skipping ahead for a few minutes while you handle other things.
- Bloom the Flour Properly: Don’t just toss in the flour and stir. Melt the butter first, then add the flour all at once and cook it for 2-3 minutes without stirring—just let it bubble and turn nutty. Only then whisk in the wine and broth. This step makes the difference between a thin sauce and a proper roux.
- Deglaze Aggressively: After adding the red wine, don’t just pour it in and walk away. Scrape the bottom of the pan with a wooden spoon—those browned bits are flavor gold. Let the wine reduce by half before adding the broth, or you’ll end up with a watery gravy instead of a rich one.
- Strain for Smoothness: Onions break down into tiny bits during cooking, and if you skip straining, your gravy will look like soup. Use a fine-mesh sieve or cheesecloth to remove the solids after simmering. It’s extra work, but the result is silky and restaurant-quality—no one will guess it’s homemade.
Dietary considerations for beef and onion gravy
Gluten-Free Adaptation
Replace the 0.5 cup All-Purpose Flour with 0.5 cup gluten-free all-purpose flour blend like Bob's Red Mill 1:1. For best results, use a blend with xanthan gum included.
Whisk the roux over medium-low heat for 4-5 minutes—gluten-free flours can break down faster, so watch closely for that pale golden color. 🌾
If you notice the gravy is too thick after adding broth, stir in 1 tablespoon cornstarch slurry (mix 1 tsp cornstarch with 2 tsp cold water) to achieve that perfect pourable consistency. The flavor will still be rich, just with a slightly different texture.
Dairy-Free Option
Skip the 0.5 cup Unsalted Butter and use 0.5 cup dairy-free butter alternative like Miyoko's or Earth Balance. For extra richness, add 1 tablespoon olive oil to the pan when caramelizing the onions.
The roux will still develop properly, though it may take 1-2 minutes longer to reach that golden hue. 🧈
Alternatively, create a dairy-free roux using 0.5 cup olive oil instead of butter. Heat it over medium-low heat and whisk in the flour until smooth. This method works well but requires even more attention to prevent burning—stir constantly and keep the heat gentle.
Low-Sodium Version
Use low-sodium beef broth (like Pacific Foods) and reduce the salt to ½ teaspoon. Boost umami with an extra 1 tablespoon Worcestershire sauce—it adds depth without extra sodium. Fresh thyme and black pepper will also enhance the flavor profile naturally. 🧂
For extra richness without salt, add 1 teaspoon fish sauce (like Red Boat) or ½ teaspoon nutritional yeast. Both provide savory depth while keeping the sodium in check. Taste as you go—you might find you don't need any added salt at all!
Vegetarian Substitutes
Swap the beef drippings for 2 tablespoons olive oil plus 1 tablespoon vegetable oil, and use 2 cups mushroom broth instead of beef broth. Caramelize 2 cups sliced mushrooms (like cremini) with the onions for extra depth. The texture will be slightly different but still velvety. 🍄
For a meaty flavor, add 1 tablespoon soy sauce or 1 teaspoon liquid smoke when deglazing with wine. The gravy will have a heartier taste that works beautifully over roasted vegetables or lentils.
Nutrition facts
Frequently asked questions
Can I make this gravy without beef drippings?
Use 2 tablespoons olive oil plus 1 tablespoon vegetable oil to caramelize the onions. For extra richness, add 1 tablespoon butter when making the roux. The flavor will be slightly different but still delicious. The key is to develop that deep caramelization in the onions first.
Why does my gravy turn out lumpy?
Lumpy gravy usually means the flour didn't dissolve properly in the roux. Always whisk constantly when adding flour to butter and cook until smooth. For extra insurance, whisk the broth vigorously as you add it. If lumps appear, blend the gravy briefly with an immersion blender for a silky texture.
How do I adjust the thickness for different uses?
For serving over meats, aim for a medium-thick consistency (like heavy cream). For dipping or drizzling, thin it slightly with extra broth. If too thick, whisk in 1 tablespoon broth at a time. If too thin, mix 1 teaspoon cornstarch with 2 teaspoons cold water and stir in while simmering.
Can I make this gravy ahead of time?
Yes! It actually tastes better the next day as the flavors meld. Store in an airtight container in the fridge for up to 5 days. Reheat gently on low heat, stirring frequently to prevent scorching. For freezing, portion into containers and freeze for up to 3 months. Thaw overnight in the refrigerator before reheating.
What's the best way to use up leftover gravy?
Transform it into gravy-stuffed potatoes by mixing with mashed potatoes and baking until golden. Use it as a sauce for roasted vegetables or as a dip for crusty bread. For a hearty meal, pour over roasted chicken or beef. The rich flavor makes it perfect for breakfast hash too—just add scrambled eggs and crispy potatoes!