Main Courses
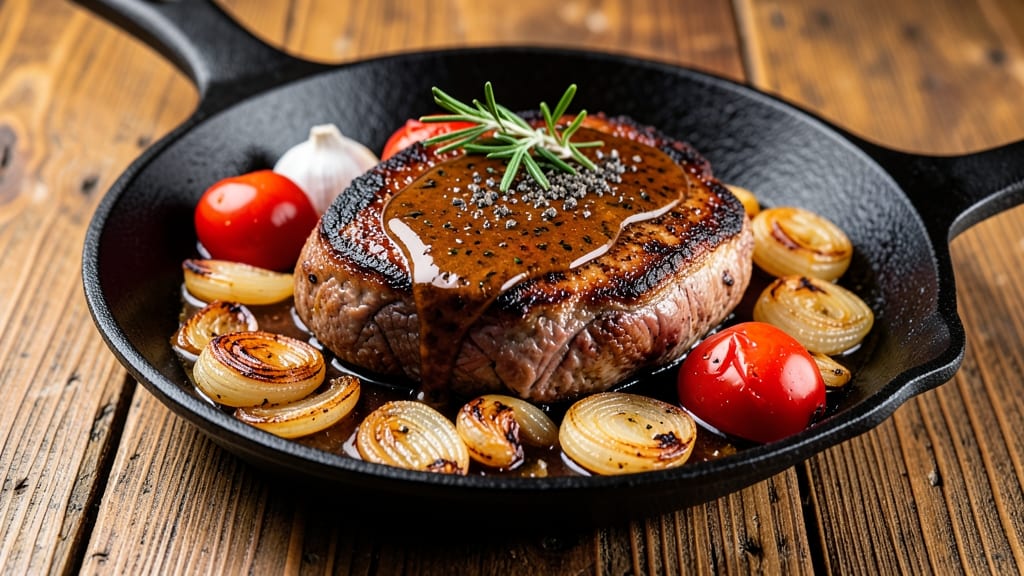
This beef and ale recipe delivers deep, caramelized richness that transforms tough cuts into melt-in-your-mouth tenderness. The secret lies in slow-braising beef with ale until the liquid reduces to a glossy, flavor-packed sauce—where every bite carries layers of umami and malty depth.
I developed this method after years of experimenting with braising techniques, and it never fails to impress even skeptical meat lovers.
The process starts with browning the beef to build a rich foundation, then simmering it low and slow with onions, garlic, and ale until the flavors meld into harmony. Caramelized onions add sweetness that balances the ale’s bitterness, while herbs like thyme and bay leaf infuse subtle earthiness.
This isn’t just a stew—it’s a restaurant-quality dish that tastes even better the next day.
What makes this recipe stand out is how the ale’s natural sweetness and acidity tenderize the beef while creating a sauce that clings to every forkful. The result is a dish that’s hearty enough for a winter dinner but versatile enough for weeknight meals.
Serve it with crusty bread to soak up every last drop of that velvety sauce.
Whether you’re cooking for a family gathering or a cozy night in, this beef and ale braise delivers foolproof results with minimal effort. The long cooking time means you can prep ahead and let the flavors develop fully—no rushed dinners here.
Let’s get started on a meal that feels like a hug in a bowl.
Ingredients for beef and ale
Here's what you'll need for this restaurant-quality beef and ale braise—simple ingredients that pack serious flavor.
| Ingredient | Amount | Notes |
|---|---|---|
| Chuck Roast 🥩 | 3 lb | Well-marbled for tenderness |
| Yellow Onions 🧅 | 3 whole | Thinly sliced for caramelizing |
| Garlic Cloves 🧄 | 6 cloves | Minced for deep flavor |
| Dark Ale 🍺 | 2 cups | Stout or porter preferred |
| Beef Broth 💧 | 2 cups | Low-sodium preferred |
| Tomato Paste 🍅 | 2 tbsp | For depth of flavor |
| Fresh Thyme 🌿 | 2 tbsp | Leaves only, chopped |
| Bay Leaves 🍃 | 2 whole | For aromatic depth |
| Olive Oil 🫒 | 2 tbsp | For searing beef |
| All-Purpose Flour 🌾 | 2 tbsp | For dusting beef |
| Salt 🧂 | 1 ½ tsp | Kosher or sea salt |
| Black Pepper 🌶️ | 1 tsp | Freshly ground preferred |
| Worcestershire Sauce 🍶 | 1 tbsp | For umami kick |
| Balsamic Vinegar 🍷 | 1 tbsp | For acid balance |
| Fresh Parsley 🌿 | ¼ cup | Chopped for garnish |
The chuck roast is non-negotiable here—it's got that perfect mix of fat and connective tissue that melts into tender perfection. Costco or Kroger usually carry it pre-cut, but if you're buying a whole roast, ask the butcher to trim it into 1.5-inch chunks. Look for good marbling—those white fat streaks are what make this dish unforgettable. If you can't find chuck, brisket works in a pinch, but trim off any large fat deposits. The onions? Yellow or sweet onions caramelize best—skip the reds, they turn muddy. I always grab a few extra because caramelized onions are worth the time.
No dark ale? Substitute with beef broth plus 1 tbsp soy sauce—it won't be identical, but you'll still get that rich depth. Fresh thyme is ideal, but dried thyme at half the amount works if that's what you've got. The Worcestershire sauce adds that savory punch—Lea & Perrins is the classic choice, but any good brand will do. For the tomato paste, I swear by San Marzano if you want to splurge, but the squeeze tubes from Trader Joe's are perfect for this recipe. The balsamic vinegar? Any good quality—don't skimp here, it balances the richness beautifully. And if you're short on time, those pre-minced garlic jars from the store work just fine—no need to get fancy.
This braise tastes even better the next day, so make a double batch if you can. The beef keeps 4-5 days in the fridge, and the sauce freezes beautifully for up to 3 months. I like to portion it into containers so I can grab it for quick lunches—just reheat with a splash of water or broth. The caramelized onions can be made ahead too; store them in the fridge for up to 1 week in an airtight container. And if you've got leftovers, freeze the sauce separately—it's perfect for slathering on toast or tossing with mashed potatoes later.
Why You'll Love This Recipe
- One-Pot Magic: I swear by this—just chuck the roast, onions, and garlic in a Dutch oven, pour in the ale and broth, and walk away. No chopping like a line cook, no fancy techniques. The onions caramelize right there while you sip your own ale (or coffee, no judgment).
- Rich Like Sunday: That dark ale isn’t just for drinking—it’s the secret weapon. The malty depth soaks into the beef, turning it impossibly tender with a crust that’s crispy on the edges. Honestly, the first bite makes you forget it’s a weeknight.
- Leftovers for Days: Between us, this recipe doubles as tomorrow’s lunch. The flavors only get better after sitting overnight—perfect for packing or reheating straight from the fridge. My freezer’s stocked with portions because I can’t resist making extra.
- Budget Beef Boost: A chuck roast is cheap, but it feels like a splurge. The ale and broth stretch it into meals that feed four for the price of takeout. Plus, the leftovers? They’re my go-to for “I’m too tired to cook” nights. Reliable, always.
Step-by-step instructions for slow-braised beef with caramelized onions
This hearty dish delivers melt-in-your-mouth beef and sweet, savory onions in a rich ale sauce.
Sear the Chuck Roast for Maximum Flavor
Pat the 3 lb chuck roast completely dry with paper towels - this helps create that perfect crust. Heat 2 tablespoons olive oil in a heavy Dutch oven over medium-high heat until shimmering. Place the roast in the pot and sear on all sides for 4-5 minutes per side until deeply browned and crispy in spots.
The key here is patience - don't rush the searing. You want that beautiful crust that'll carry through the braising process. Once browned, remove the roast and set it aside on a plate. Here's the thing - those browned bits are pure flavor, so we'll scrape them up later when we deglaze the pot.
Caramelize the Onions Until Golden Brown
In the same Dutch oven, add 3 whole yellow onions sliced into thin rounds. Cook them over medium heat for 15-20 minutes, stirring occasionally, until they turn a deep golden brown color. This process takes time, but it's worth it for that sweet, jammy texture.
About halfway through, add 6 cloves minced garlic and cook for another 30 seconds until fragrant. Don't walk away - you want those onions to caramelize evenly without burning. When they're ready, they should be soft, sweet, and almost like jam. Remove them and set aside with the roast.
Create the Rich Ale Sauce
Reduce the heat to medium-low and sprinkle 2 tablespoons all-purpose flour over the browned bits in the pot. Stir vigorously for 1-2 minutes to cook off the raw flour taste. Then pour in 2 cups dark ale and 2 cups beef broth, scraping up all those flavorful browned bits from the bottom.
Add 2 tablespoons tomato paste, 2 whole bay leaves, 2 tablespoons chopped fresh thyme, 1.5 teaspoons salt, 1 teaspoon black pepper, 1 tablespoon Worcestershire sauce, and 1 tablespoon balsamic vinegar. Stir everything together and bring to a gentle simmer. This is where all the magic happens - the ale and broth will create a rich, flavorful base for your beef.
Braise Until Tender Perfection
Return the roast and caramelized onions to the pot. The liquid should come about halfway up the sides of the roast. Bring everything to a gentle simmer, then cover with a tight-fitting lid. Transfer to a 325°F oven and cook for 3-4 hours, or until the beef is fork-tender.
Here's the crucial part - don't peek! Every time you lift the lid, you lose heat and moisture. Instead, check the doneness by inserting a fork into the thickest part of the meat. If it slides in easily, your beef is ready. The sauce should be thick and glossy, with the onions perfectly tender.
Finish and Serve with Fresh Parsley
Once the beef is tender, remove the roast and onions to a serving platter. Skim off any excess fat from the sauce in the pot, then return the pot to the stove over medium heat. Let the sauce reduce for 5-10 minutes until it coats the back of a spoon.
Slice the beef against the grain into ¼-inch thick slices and arrange it on the platter with the caramelized onions. Spoon the reduced sauce over the top and garnish with 0.25 cup chopped fresh parsley. Serve immediately with crusty bread or mashed potatoes to soak up that delicious sauce. The result should be fall-apart tender beef with sweet, caramelized onions in a rich, flavorful ale gravy.
Pro Tips For Making Beef And Ale
- SEAR THE ROAST FIRST: Hit that chuck roast with high, dry heat for 4-5 minutes per side before adding anything else—it builds flavor faster than slow-cooking alone. I used to skip this, and the dish always tasted like it needed more depth.
- CHAR THE ONIONS LOW: Caramelize those yellow onions on medium-low heat for 20-25 minutes until deep amber, not burnt. Too much heat turns them bitter, and you’ll regret it when they’re the base of your sauce.
- USE STOUT, NOT LIGHT ALE: Dark ale or stout adds richness and depth—light beer just won’t cut it. If all you have is a pale ale, reduce it by half first to concentrate the flavor.
- SKIP THE BROTH BOIL: Let the beef broth simmer gently with the ale, never boil it hard—it’ll scramble the proteins and turn your sauce cloudy. Keep it at a bare simmer, or you’ll end up with glue-like gravy.
Common mistakes when making perfect results
Skipping the Sear
This is the #1 mistake I see—skipping the sear or doing a half-hearted job. That golden crust isn’t just for looks; it’s packed with Maillard reaction flavors that form the foundation of your dish.
Use a heavy Dutch oven (like Le Creuset) and sear the beef over medium-high heat for 4-5 minutes per side until deeply browned. If your pan isn’t hot enough, the beef will steam instead of develop that flavorful crust. Trust me, the difference is night and day. 🔥
Using the Wrong Ale
Not all ales are created equal! Light lagers or pale ales won’t cut it—they lack the malty depth and caramel notes that pair perfectly with beef. Opt for a dark ale, stout, or porter (like Guinness or Samuel Smith’s Nut Brown Ale).
If you’re stuck with a lighter ale, boost the flavor by adding 1 tbsp soy sauce or ½ cup beef broth to compensate. The ale’s bitterness should balance the richness, not get lost in it.
Overcrowding the Pot
Here’s a rookie move: throwing everything in the pot at once. If your beef isn’t submerged in liquid, it’ll steam instead of braise, leading to tough, dry meat. The liquid should come about halfway up the sides of the beef.
If it’s too little, add more beef broth (not water—it’ll dilute the flavors). And for heaven’s sake, don’t skip the deglaze step! Those browned bits on the bottom are flavor gold—scrape them up with a wooden spoon when you add the ale and broth. 💛
Peeking Too Often
I get it—you’re eager to see how it’s coming along. But every time you lift that lid, you’re letting heat and moisture escape, which extends cooking time and can make the beef tough.
Instead of peeking, use the fork test: Insert a fork into the thickest part of the meat. If it slides in easily, your beef is ready. Pro tip: Set a timer for 3-4 hours and let the oven do the work. Patience is key here!
Ignoring the Resting Time
You’ve worked hard to get that tender beef, so don’t ruin it by slicing it too soon! Let the beef rest for 10-15 minutes after removing it from the pot. This allows the juices to redistribute, keeping every bite moist and flavorful.
Skipping this step means you’ll end up with dry, stringy meat. While it rests, use that time to reduce the sauce and skim off any excess fat. Trust the process—your taste buds will thank you. ✨
Over-Salted Sauce
It’s easy to go overboard with salt, especially when you’re adding Worcestershire sauce, soy sauce, and balsamic vinegar—all of which already pack a salty punch. Taste your sauce before serving and adjust with a pinch of salt if needed.
Remember, you can always add more, but you can’t take it out. I like to taste the sauce before adding the beef back in, so I can adjust the seasoning while it’s still liquid. A little goes a long way!
Nutrition facts
Frequently asked questions about beef and ale braising
What’s the best cut of beef for this recipe?
Use a well-marbled cut like chuck roast or brisket—they’re packed with fat and connective tissue that melt into tender perfection during braising. Avoid lean cuts like sirloin, which dry out. If you can’t find chuck, short ribs or stew meat work too, but trim excess fat first.
Can I substitute ale with another liquid?
Yes! If you don’t have ale, use 2 cups beef broth + 1 tbsp soy sauce for depth, or red wine + ½ cup beef broth for a richer flavor. Avoid water—it’ll dilute the sauce. For a non-alcoholic version, try ginger beer or dark beer substitute (like Barley’s).
How do I know when the beef is tender enough?
Insert a fork into the thickest part of the beef—if it slides in easily with no resistance, it’s done! For chuck roast, this usually takes 3-4 hours at 325°F. If you’re unsure, slice a small piece and check: it should shred easily. Overcooking can make it mushy, so trust the fork test!
Can I make this recipe in a slow cooker?
Sear the beef first, then transfer everything to a 6-quart slow cooker on Low for 8 hours or High for 5-6 hours. The liquid will reduce less, so you may need to simmer it uncovered for 15-20 minutes at the end to thicken the sauce. The slow cooker method is perfect for hands-off prep!
What’s the best way to reheat leftovers?
Reheat gently in a skillet with a splash of beef broth over low heat to prevent drying out. Avoid microwaving—it makes the beef tough. For best results, store leftovers in the fridge for up to 5 days or freeze for 3 months. The flavors actually improve over time!