Main Courses
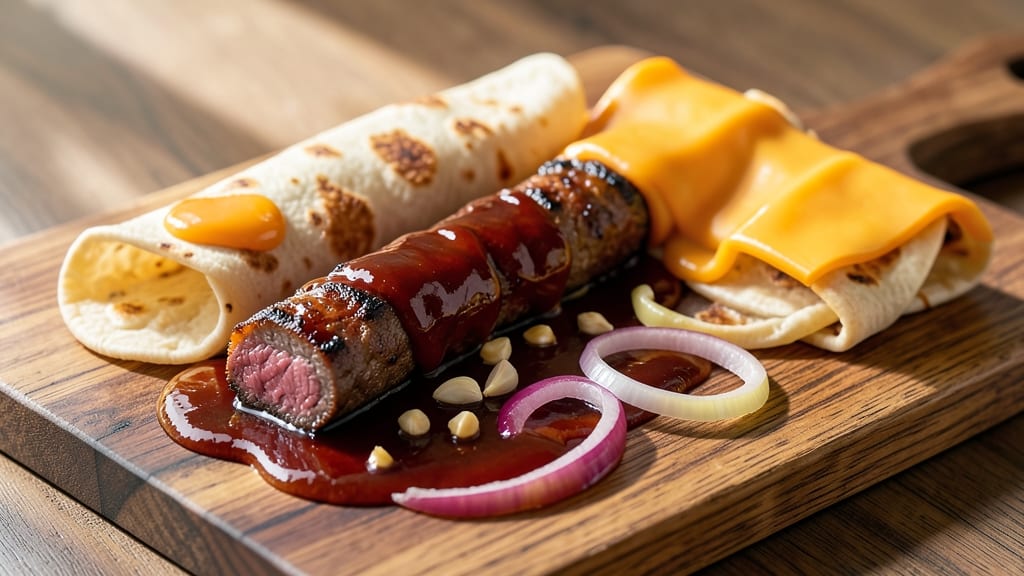
This crispy BBQ beef sticks recipe transforms simple tortillas into finger-licking, pull-apart masterpieces that deliver smoky-sweet-spicy flavor in every bite. 🔥 After years of perfecting the balance between tender beef and crispy tortilla layers, I've cracked the code for restaurant-quality results at home—no deep-frying required.
The secret lies in marinating the beef overnight and layering it with melted cheese and tortillas before baking until golden and irresistible.
The magic happens when thinly sliced beef gets coated in a tangy-sweet BBQ sauce that caramelizes beautifully during baking. Wrapped in tortillas and cheese, each bite offers a perfect contrast of textures—juicy beef, creamy cheese, and crispy edges that hold up even when pulled apart.
This recipe delivers a crowd-pleasing meal that's perfect for game day, potlucks, or a hearty weeknight dinner when you want something hands-on and flavorful.
What you'll end up with is a dish that looks impressive but requires minimal effort—just marinate, assemble, and bake. The result? A stack of crispy, cheesy beef sticks that everyone will fight over, with that perfect balance of smoky BBQ flavor and satisfying crunch.
The best part? Leftovers reheat beautifully, making this an ideal make-ahead option for busy schedules.
Serve with classic BBQ sides like coleslaw, baked beans, or cornbread to round out the meal. This recipe proves you don't need fancy equipment to create restaurant-worthy flavors—just a few simple ingredients and the patience to let the flavors develop. Let's get cooking!
Ingredients for bbq beef sticks
Sixteen ingredients transform into crispy, cheesy, smoky-sweet beef sticks that'll disappear in minutes.
| Ingredient | Amount | Notes |
|---|---|---|
| Thinly Sliced Beef Top Round Roast 🥩 | 2 lbs | Cut against grain for tenderness |
| Flour Tortillas 🌯 | 12 whole | Medium size, soft flour tortillas |
| Shredded Sharp Cheddar Cheese 🧀 | 3 cups | Freshly shredded from block |
| BBQ Sauce 🍅 | 1 ½ cups | Store-bought or homemade tangy-sweet |
| Yellow Onion 🧅 | 1 whole | Thinly sliced, for marinade |
| Garlic Cloves 🧄 | 6 cloves | Minced for marinade |
| Apple Cider Vinegar 🍎 | ¼ cup | For tangy marinade |
| Brown Sugar 🍚 | ¼ cup | For caramelized flavor |
| Smoked Paprika 🌶️ | 1 tbsp | For smoky depth |
| Ground Black Pepper 🌶️ | 1 tsp | Freshly cracked |
| Olive Oil 🫒 | ¼ cup | For marinade richness |
| Salt 🧂 | 1 ½ tsp | Kosher or sea salt |
| Honey 🍯 | 2 tbsp | For sweet balance |
| Dried Thyme 🌿 | 1 tsp | For earthy aroma |
The beef is the star—top round roast cuts thinly against the grain for that perfect tender bite. Costco or Walmart usually carry pre-sliced beef for convenience, but if you're slicing yourself, ask the butcher for ¼-inch slices. Freshly shredded cheese makes all the difference (no pre-shredded clumps!), so grab a block of sharp cheddar and shred it yourself. The tortillas? Mission brand flour tortillas are my go-to—they hold up perfectly during baking. For the marinade, Penzeys smoked paprika adds that authentic BBQ depth, but any quality smoked paprika works.
No time to marinate overnight? 2 hours minimum still works—just let it sit at room temp before assembling. Swap the apple cider vinegar for red wine vinegar if you prefer, and honey can be replaced with maple syrup for a vegan option. Running low on sharp cheddar? Monterey Jack or pepper jack both work beautifully. The BBQ sauce is flexible—Sweet Baby Ray's or Stubb's are crowd-pleasers, but homemade with tomato paste, molasses, and spices is even better. For extra crispiness, brush the assembled sticks with a little olive oil before baking.
Marinated beef keeps 3 days in the fridge—use it up or freeze for 2 months. Tortillas stay fresh in their package for 2 weeks at room temp, but once opened, seal them in a ziplock bag with a paper towel to prevent drying. The assembled sticks can be baked ahead and reheated for 10 minutes at 350°F—they taste even better the next day! Store leftovers in an airtight container and reheat covered with foil to keep them crispy.
Why You'll Love This Recipe
- No-Fuss Assembly: I swear by the "roll, slice, repeat" method—no fancy techniques, just beef, tortillas, and a quick wrap. The thinly sliced top round stays tender even when chilled, so you’re not stuck babysitting the grill or oven.
- Smoky Cheese Magic: That sharp cheddar melts into a gooey blanket while the BBQ sauce caramelizes into a sticky, tangy crust. Honestly, the contrast of crispy tortilla edges and creamy cheese is my kind of comfort food—no fancy plating needed.
- Game for Any Gathering: Pack them for tailgates, toss them in a cooler for a picnic, or serve them at a casual dinner when you’d rather chat than cook. They’re hearty enough for a crowd but simple enough to make when your friends drop by unannounced.
- Budget Meal That Stretches: A pound of beef and a bag of tortillas feed four for under $10—leftovers reheat beautifully in the microwave or air fryer. Between us, these are the kind of snacks that disappear fast but won’t break the bank.
Step-by-step instructions for BBQ beef sticks
Here's how to transform simple ingredients into irresistibly crispy, pull-apart beef sticks that'll disappear faster than you can say "second helping."
👨🍳 Step 1: Create the Flavor-Packed Marinade
In a large bowl, combine the thinly sliced beef top round roast with the 0.25 cup olive oil, 0.25 cup apple cider vinegar, 2 tbsp honey, 0.25 cup brown sugar, 1 tbsp smoked paprika, 1.5 tsp salt, 1 tsp ground black pepper, 1 tsp dried thyme, and the 6 minced garlic cloves. Mix everything thoroughly with your hands until the beef is evenly coated and the marinade clings to every slice.
Here's the thing—this marinade does double duty. It tenderizes the lean beef while infusing it with smoky-sweet depth. Let it sit at room temperature for 15 minutes while you prep the rest. The beef will develop incredible flavor and texture from this brief marinating time.
🍳 Step 2: Cook the Beef Until Perfectly Tender
Heat a large skillet over medium-high heat and add the marinated beef in a single layer. Cook undisturbed for 3-4 minutes until the edges begin to brown. Flip the slices and cook another 3-4 minutes until they reach 160°F internally and are just cooked through. Don't overcrowd the pan—work in batches if needed to maintain even cooking.
I like to press down gently on the beef during the first minute of cooking—this prevents it from curling and ensures even contact with the pan. The beef should be fork-tender but still hold its shape. Transfer to a plate and tent loosely with foil to keep warm while you assemble the tortillas.
🥘 Step 3: Assemble the Crispy BBQ Beef Sticks
Lay out 6 of the flour tortillas on a clean work surface. Divide the cooked beef evenly among them, spreading each tortilla with about ⅓ cup of the beef. Sprinkle each with ½ cup of shredded sharp cheddar cheese and ¼ cup of BBQ sauce. Fold each tortilla into thirds like a taco, pressing gently but firmly to seal.
Here's where the magic happens: place the folded tortillas seam-side down on a parchment-lined baking sheet. Brush the tops generously with remaining BBQ sauce—this creates that beautiful caramelized crust we're after. The sauce should pool slightly in the center of each tortilla.
🔥 Step 4: Bake Until Golden and Crispy
Preheat your oven to 375°F. Bake the beef sticks for 12-15 minutes until they're deep golden brown and the cheese is fully melted. The edges should be crispy while the centers remain tender—this is your perfect texture balance. Rotate the baking sheet halfway through for even browning.
Don't be tempted to peek early. The residual heat after opening the oven will steam the tortillas instead of crisping them. When you see those beautiful caramelized edges with crispy tortilla crusts, they're ready. The cheese should be melted but not stringy—just gooey and stretchy.
🔪 Step 5: Slice and Serve with Maximum Drama
Let the beef sticks rest for 2-3 minutes before slicing into 1-inch pieces. The resting time helps the flavors meld and the tortillas set slightly. Cut through the center of each stick, creating those irresistible pull-apart pieces that'll have everyone reaching for seconds.
Serve immediately with any remaining BBQ sauce for dipping on the side. The contrast of crispy tortilla, tender beef, melted cheese, and smoky-sweet sauce in every bite is what makes these beef sticks absolutely addictive. Pro tip: keep them warm in a 200°F oven if serving family-style to maintain that perfect crispiness.
Pro Tips For Making Bbq Beef Sticks
- SEAR THE BEEF FIRST: Hit that sliced top round with a quick sear in a screaming-hot skillet—just 30 seconds per side—before assembling. I learned this the hard way: skipping the sear makes the sticks soggy and flavorless. The crust locks in juices and gives you that smoky depth the BBQ sauce can’t fake.
- DRY THOSE TORTILLAS: Warm your flour tortillas in the dry skillet for 10 seconds before adding cheese—just enough to soften but not crisp. Wet tortillas turn your beef sticks into cheesy burritos, not crispy, saucy bites. (Yes, even if you’re impatient like me.)
- LAYER CHEESE THIN: Spread shredded cheddar in a thin, even layer—about ¼-inch thick—or it’ll ooze out when you roll. I used to dump it in, and half the cheese ended up on my counter. A quick pass with a fork to fluff the shreds first helps too.
- REST THE ROLLS: Stack your beef-stuffed tortillas, wrap in foil, and let them sit for 5 minutes before slicing. Cutting too soon means messy, unraveling sticks. (Your future self will thank you—trust me, I’ve seen the chaos.)
Serving suggestions for this dish
Game Day Essentials
Serve these beef sticks with classic BBQ sides that complete the meal.
My go-to is creamy coleslaw—toss 4 cups shredded cabbage and 1 cup shredded carrots with a dressing of ½ cup mayo, 2 tbsp apple cider vinegar, 1 tbsp honey, and 1 tsp celery seeds. The cool crunch cuts through the richness perfectly. 🥗
For a heartier option, baked beans with smoky bacon and brown sugar add depth. I use 2 cans (15 oz each) navy beans, 4 slices cooked bacon, ½ cup BBQ sauce, and 2 tbsp brown sugar.
Simmer for 20 minutes until thickened. The sweet-savory contrast makes every bite unforgettable.
Cheesy Sides
Add cornbread muffins for a Southern touch. Mix 1 cup cornmeal, 1 cup flour, 1 tbsp baking powder, ½ tsp salt, 1 egg, ¾ cup buttermilk, and 2 tbsp melted butter.
Bake at 400°F for 15-18 minutes. The slight sweetness balances the smoky BBQ flavors beautifully.
For a quick option, queso dip with tortilla chips is a crowd-pleaser. Melt 16 oz Monterey Jack cheese with ½ cup sour cream, 1 tbsp lime juice, and ½ tsp cumin.
Serve warm with chips for dipping the beef sticks. The creamy, tangy contrast is pure magic. 🧀
Drink Pairings
For a refreshing match, sweet tea with a splash of lemon is my go-to. Brew 4 tea bags in 4 cups hot water, add ¼ cup sugar, and chill. The Southern classic complements the smoky-sweet flavors perfectly. 🍹
For a non-alcoholic option, sparkling lemonade adds a crisp finish. Mix 1 cup lemon juice, ½ cup honey, and 4 cups sparkling water. The effervescence cleanses the palate between bites. For adults, a light lager like Miller Lite or a dry Riesling balances the richness without overpowering.
Presentation Tips
Arrange the beef sticks on a large wooden board or platter for a rustic BBQ vibe. Add fresh cilantro or green onions as garnishes for a pop of color. Serve with toothpicks for easy pulling—it adds to the fun and makes it feel like a true game-day spread. 🌿
For a festive touch, drizzle extra BBQ sauce in a zigzag pattern over the top before serving. Add pickled jalapeños or red onion slices for a crunchy contrast.
The visual appeal makes it feel like a restaurant-worthy dish, even at home. The key is keeping everything warm until serving—200°F oven works perfectly for holding heat.
Nutrition facts
Frequently asked questions
Can I use pre-cooked beef sticks instead of fresh beef?
Pre-cooked beef sticks work perfectly—just skip the cooking step and proceed directly to assembling them with cheese and tortillas. For best results, pat them dry before wrapping to ensure crispiness. The marinade step still adds great flavor, so toss the pre-cooked sticks in the marinade for 15-20 minutes before assembling.
How do I make these beef sticks extra crispy?
For maximum crispiness, brush the assembled tortillas with a thin layer of olive oil before baking. Bake at 375°F for 15-18 minutes, then broil for 1-2 minutes at the end. Use a wire rack on a baking sheet to allow air circulation underneath, and avoid overcrowding the pan. The secret is patience—don't rush the baking time!
Can I make these ahead of time?
Yes! Assemble the beef sticks up to 24 hours ahead and refrigerate them in an airtight container. When ready to bake, let them sit at room temperature for 30 minutes before baking. For leftovers, reheat at 350°F for 10-12 minutes covered with foil to maintain moisture, then unwrap and crisp under the broiler for 1-2 minutes.
What if my tortillas aren't crispy enough?
If your tortillas turn out soft instead of crispy, try using corn tortillas next time—they hold up better to baking. For flour tortillas, bake at a slightly higher temperature (400°F) for 10-12 minutes before adding cheese, then proceed with the recipe. Another trick is to spray the assembled sticks lightly with cooking spray before baking for extra crunch.
Can I make these gluten-free?
Use gluten-free flour tortillas or corn tortillas (naturally gluten-free). For the marinade, ensure all ingredients are certified gluten-free. The beef and cheese remain gluten-free, so the only adjustments needed are the tortillas. Look for brands like Siete or Mission Gluten-Free for reliable options.